Would you like to transform your backyard into an outdoor oasis without spending a fortune? I get it – creating a beautiful garden feels impossible when you’re watching your wallet. However, here’s the thing – some of the most stunning gardens I’ve seen began with limited budgets and a wealth of creativity.
What you really need is a solid plan and a willingness to get your hands a little dirty. This article guides you through 21 practical, budget-friendly garden ideas that work well in almost any backyard space. Whether you’ve got a tiny balcony or a sprawling yard, you’ll find something here to get you started. Let’s dig in.
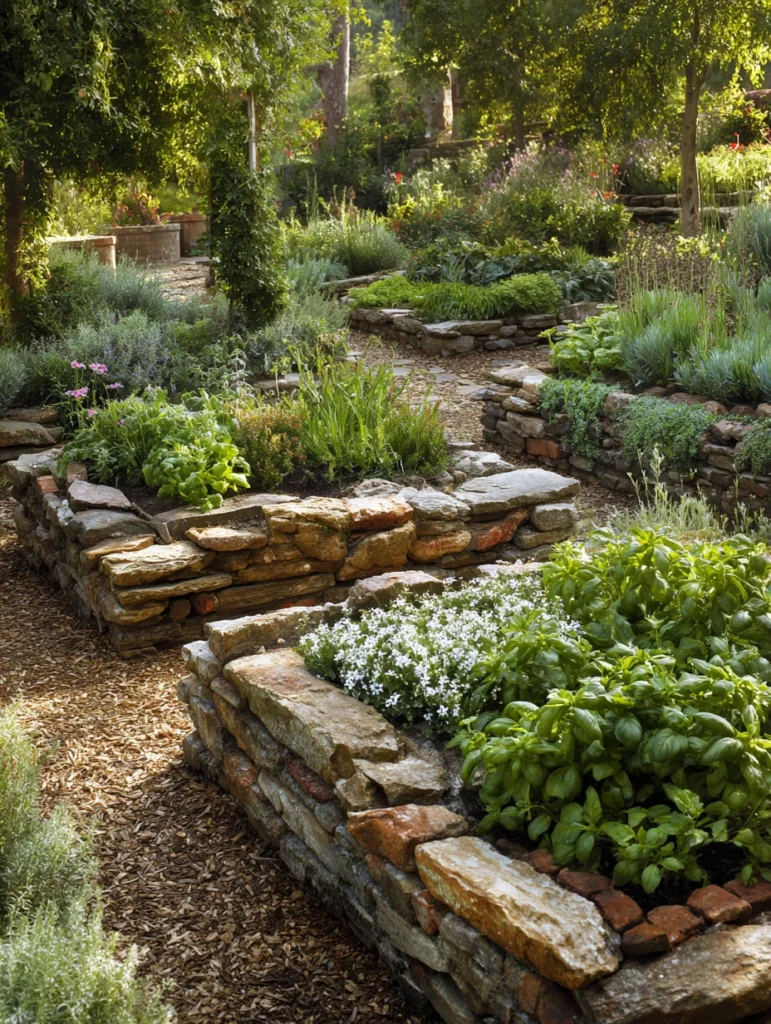
1. Create Raised Garden Beds Using Recycled Materials
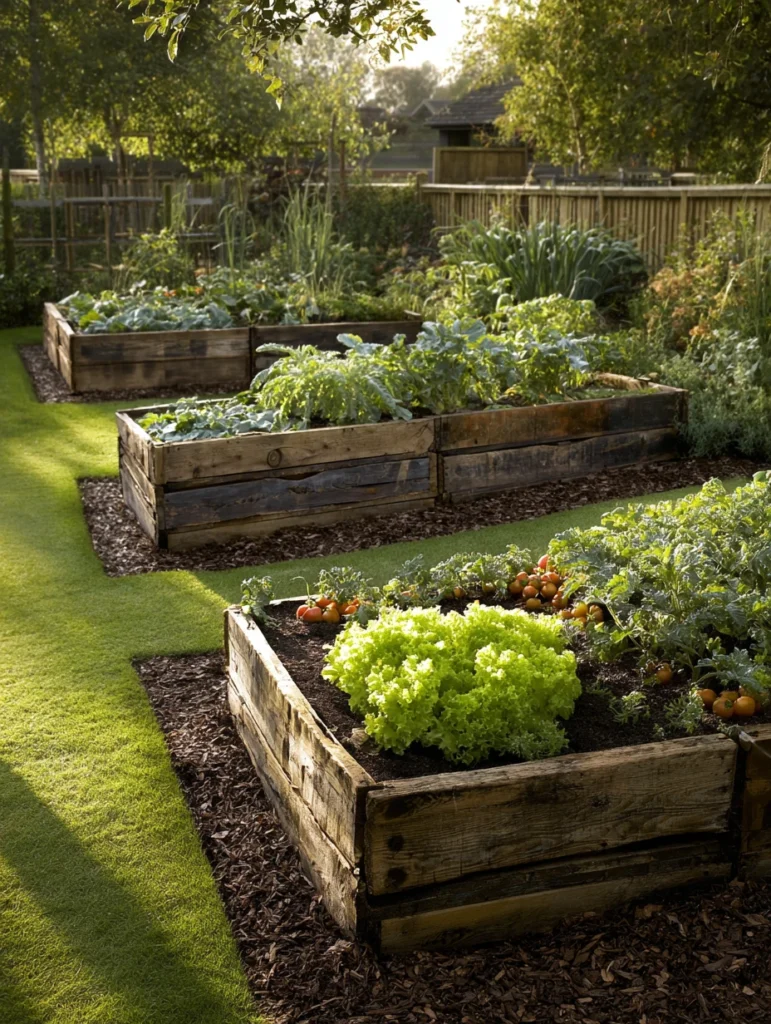
Why Raised Beds Matter: Raised beds give you complete control over soil quality and drainage, which directly affects plant health and growth rates. You’re essentially creating the perfect environment for your plants without the need for expensive amendments or constant maintenance.
Material Selection Tips: Scout your neighborhood for free or cheap materials – check Facebook Marketplace, Craigslist, or local construction sites for discarded wood. Old pallets are everywhere, and most businesses will let you take them for free. Just make sure any wood you use isn’t treated with harmful chemicals.
Product Spotlight: The Miracle-Gro Raised Bed Soil gets mixed with affordable potting mix to stretch your soil budget further, while Landscape Fabric blocks weeds underneath your beds and saves you hours of weeding throughout the season.
Read More: 21 Inspiring Vegetable Garden Design Ideas
2. Start a Compost Bin for Free Garden Gold
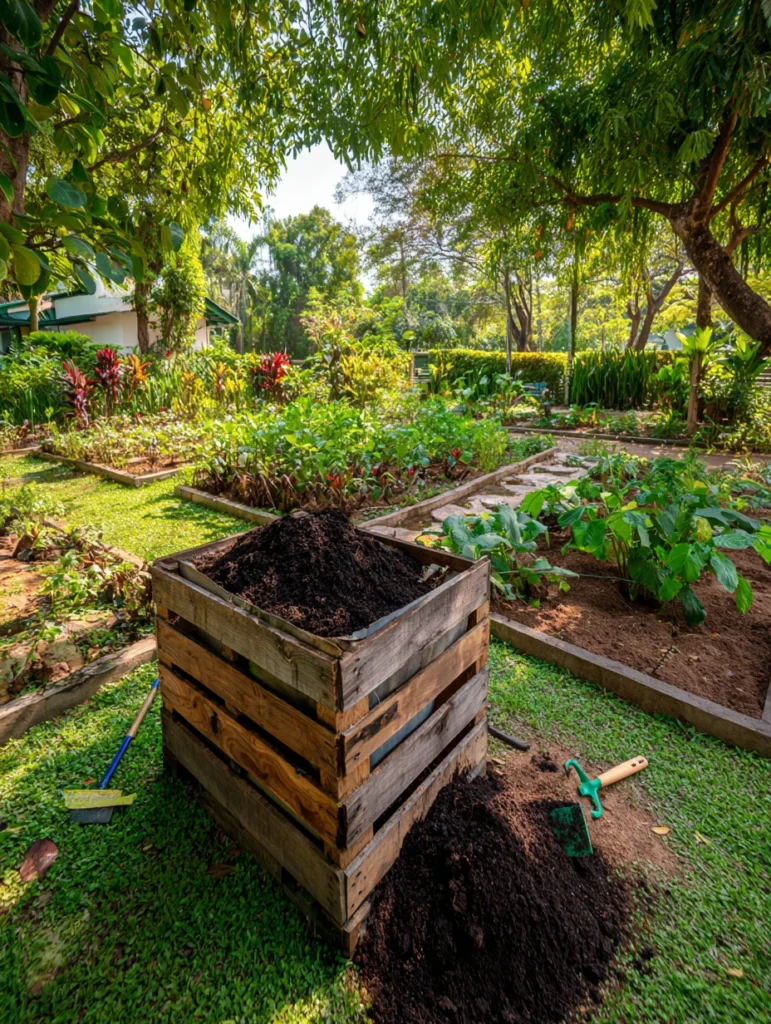
Building Your System: Stack four wooden pallets into a square, secure them with zip ties or wire, and you’ve got a bin that costs nothing but holds tons of material. If pallets aren’t available, use chicken wire stapled to wooden posts, or simply pile the materials in a designated area and turn them occasionally.
What Goes In: Alternate between green materials (food scraps, grass clippings, coffee grounds) and brown materials (leaves, shredded paper, straw) in roughly equal layers. Keep it moist, like a wrung-out sponge, and turn it occasionally. You’ll have finished compost in 6-12 months, depending on how often you work it.
Product Spotlight: A Compost Aerator Tool speeds up decomposition by efficiently mixing materials without the heavy labor of constant turning, while a Compost Starter with beneficial microbes helps jump-start the process for faster results.
Read More: 21 Small Zen Garden Ideas for a Tranquil Home
3. Design Pathways Using Mulch and Budget Materials
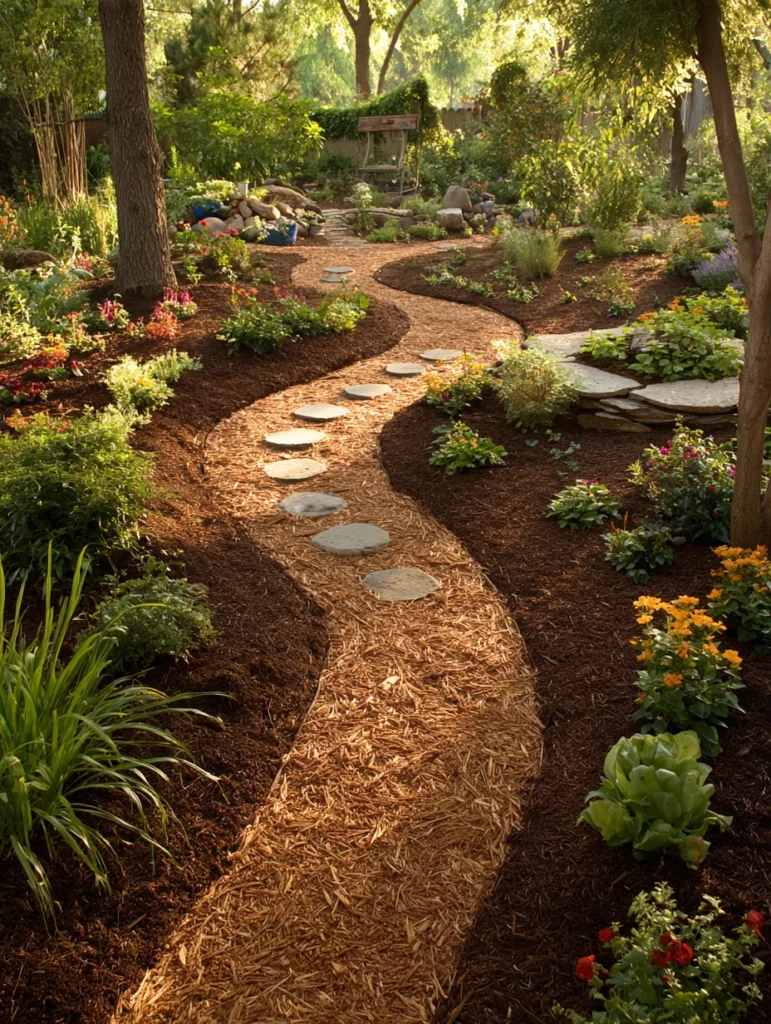
Laying Out Your Design: Sketch your pathways on paper first, then use stakes and string to mark the routes on the ground. You want a natural flow that connects different areas, from the patio to the vegetable garden and seating spots. Straight paths look formal, while curved paths feel more natural and spacious.
Material Application: Spread your chosen material 3-4 inches deep for good coverage and weed suppression. Use landscape fabric underneath to reduce weeds and extend the life of your mulch. This saves you money in the long term because you won’t need to reapply as frequently, and your mulch stays cleaner.
Product Spotlight: Landscape Fabric prevents weeds from growing through your pathways and significantly extends the lifespan of mulch. At the same time, the Mulch Depth Gauge helps you apply a consistent thickness across all paths, resulting in a professional, polished look.
Read More: 21 Cottage Garden Ideas for a Whimsical Space
4. Use Container Gardens for Flexible Planting
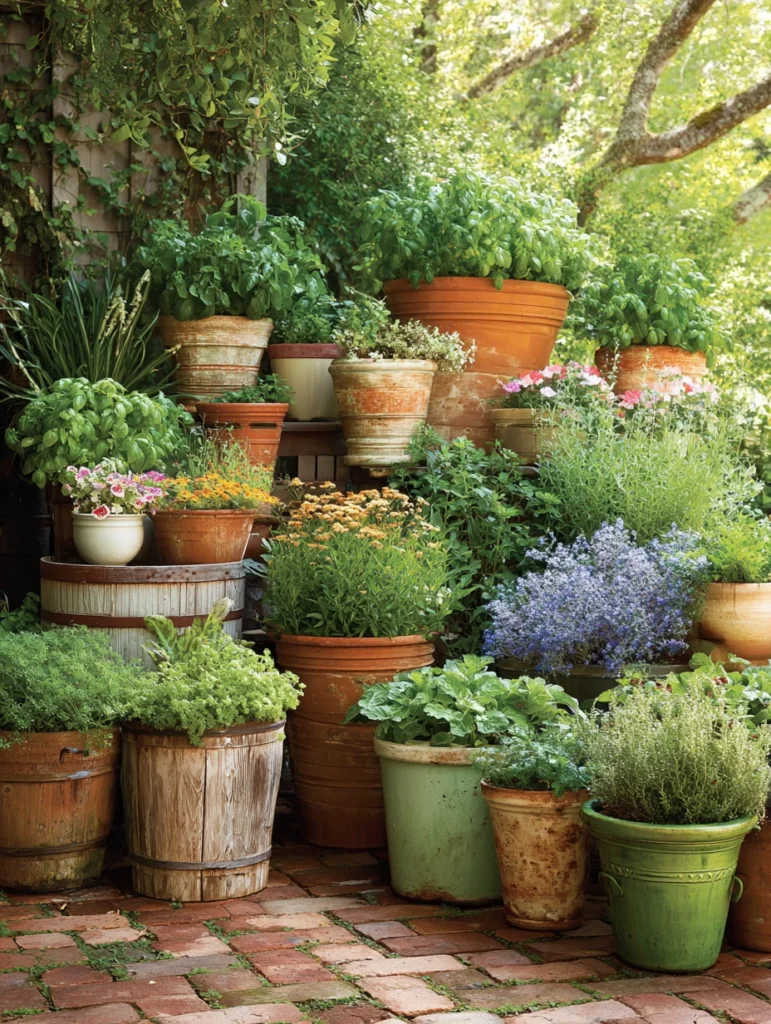
Container Selection Strategy: Don’t buy expensive pots – raid your garage for buckets, use old colanders, or grab cheap storage containers from discount retailers. The key is having at least one drainage hole at the bottom. If you love the look of a container but it doesn’t have drainage, nest a draining pot inside it.
Soil and Spacing: Mix potting soil with compost you’ve made to stretch the budget. Plant spacing matters even in containers – avoid overcrowding, as this can lead to your plants competing for nutrients and water. A good rule of thumb is one large plant per 5-gallon container, or several smaller plants if they’re herbs or trailing varieties.
Product Spotlight: Container Potting Mix, blended with your homemade compost, provides an affordable growing medium that drains well. Meanwhile, Terracotta Watering Globes automatically water your containers when the soil dries out, reducing water waste and plant stress.
Read More: How to Design a Container Garden for Your Flowers
5. Install Vertical Gardens to Maximize Space
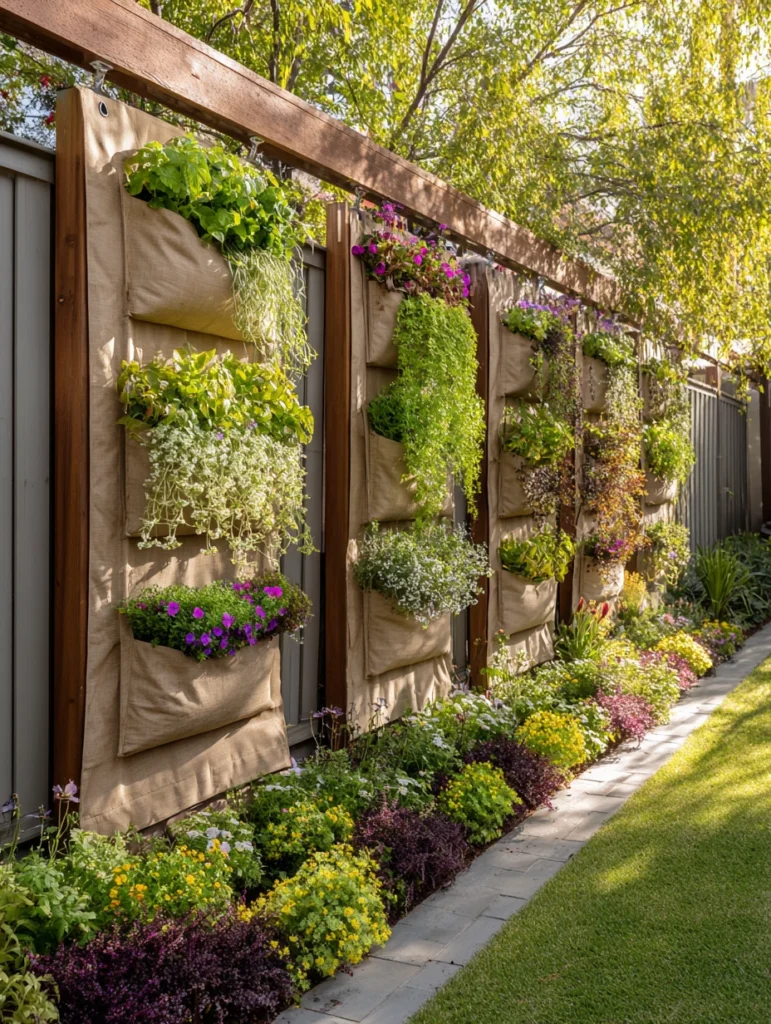
Building Options: Attach a shoe organizer to a fence and fill pockets with soil and plants for instant vertical gardening. Or use wooden pallets hung horizontally, add landscape fabric to the back, and create tiered planting zones. Even simpler: use wire shelving and place containers on each shelf to create a stackable garden.
Plant Selection: Herbs like mint, basil, and oregano thrive well when grown vertically, allowing for a consistent harvest. Trailing flowers, such as petunias and bacopa, look gorgeous when cascading down. Lettuce varieties grow surprisingly well in shallow pockets, providing you with fresh salad ingredients right by your door.
Product Spotlight: A Vertical Garden Wall Planter Kit with built-in drip irrigation eliminates the need for manual watering, keeping plants hydrated. Wall-mounted garden stakes help train vining plants to grow in the desired direction, providing a more organized appearance.
Read More: Amazing Herb Garden Ideas for Your Outdoor Oasis
6. Propagate Plants to Build Your Collection Free
Easy Propagation Methods: Cut 4-6 inch stems just below a node (where leaves attach), remove the lower leaves, and place them in water until roots develop. This method works for most herbs. For plants that produce runners or stolons, pin them into the soil while they are still attached to the parent plant, and then cut them free once they have rooted. Divide perennials by carefully separating connected stems at the base and replanting sections.
Timing Matters: Spring is an ideal time for propagation because plants are actively growing and establishing themselves quickly. You can propagate in other seasons, but spring and early summer yield the fastest and most successful results. Keep cuttings in indirect light while their roots develop, and maintain moisture without allowing them to become waterlogged.
Product Spotlight: Rooting Hormone Powder significantly enhances propagation success rates by promoting faster root development. Propagation Trays with Humidity Domes maintain consistent moisture and warmth for cuttings, significantly reducing failure rates.
Read More: 21 Corner Garden Ideas to Transform Your Backyard
7. Build Borders and Edging with Natural Materials
Stone and Brick Options: Flat stones create the cleanest look and are easy to install – just dig a shallow trench and nestle them in. Irregular stones feel more natural and rustic. Bricks can be laid flat edge-to-edge or stood at angles for a more decorative appearance.
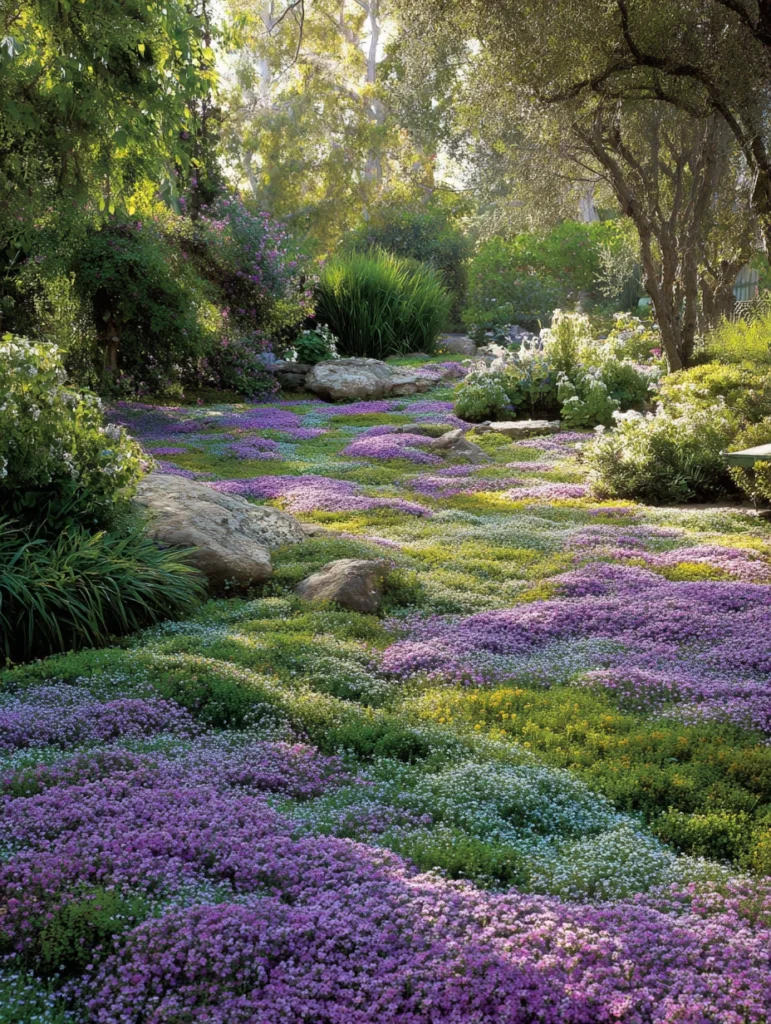
Living Borders: Use low-growing plants as living borders – creeping thyme, alyssum, or sedums create definition while adding color and texture. These living borders naturally suppress weeds and provide habitat for pollinators. They require minimal maintenance once established and actually improve over time.
Product Spotlight: Heavy-Duty Landscape Edging Stakes keep natural borders in place through seasons of weather and foot traffic without bending or breaking, while Landscape Spike Anchors secure anything from branches to salvaged materials, keeping your borders neat and permanent-looking.
Read More: Stunning Flower Bed Ideas for the Front of the House
8. Create a Pollinator Garden to Support Local Ecosystems
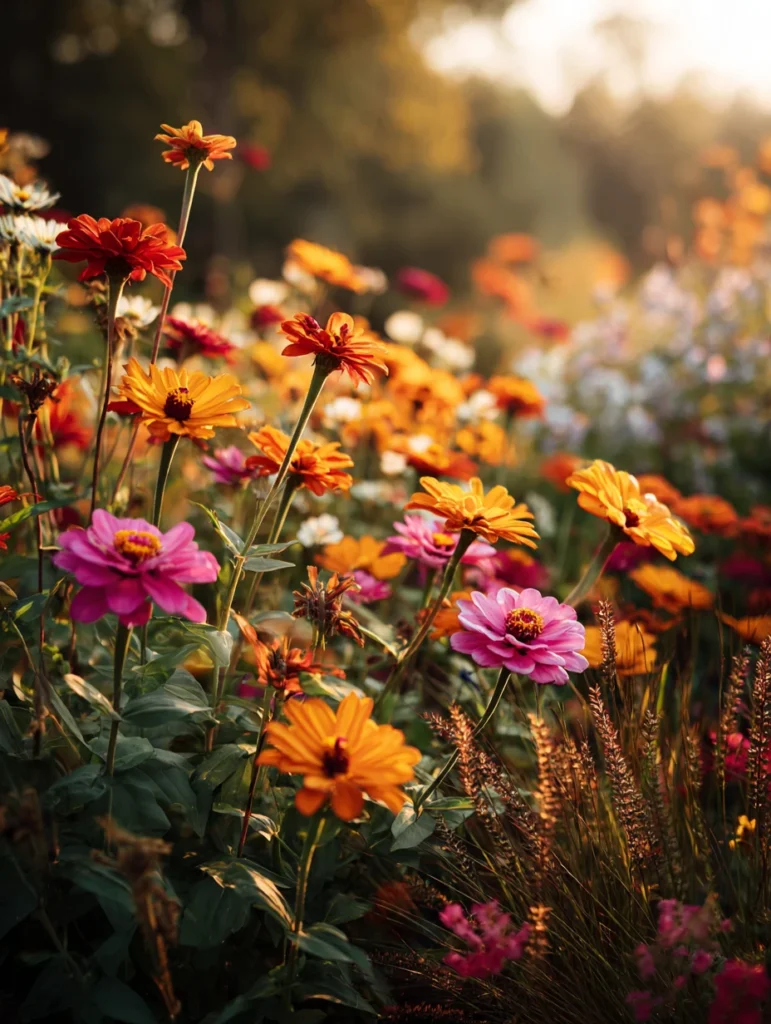
Plant Selection: Select a variety with a range of bloom times to enjoy flowers from spring through fall. Mix different flower heights – tall sunflowers in the back, mid-height zinnias in the middle, and low-growing alyssum in the front. Include native wildflowers suited to your region – these typically cost nothing beyond seed packets.
Garden Layout: Group plants in clusters of the same variety rather than scattering single plants. Clusters attract pollinators more effectively and create a visual impact. Leave some areas unmulched or plant native ground covers – pollinators need bare soil for nesting.
Product Spotlight: Wildflower Seed Mix for Pollinators features multiple species that bloom at various times, providing a continuous food source throughout the season. Meanwhile, Bee Hotel Blocks provide nesting habitats for native bees, encouraging them to stay and pollinate your entire garden.
Read More: 21 Magical DIY Fairy Garden Ideas for Your Backyard
9. Repurpose Old Pallets for Garden Structures
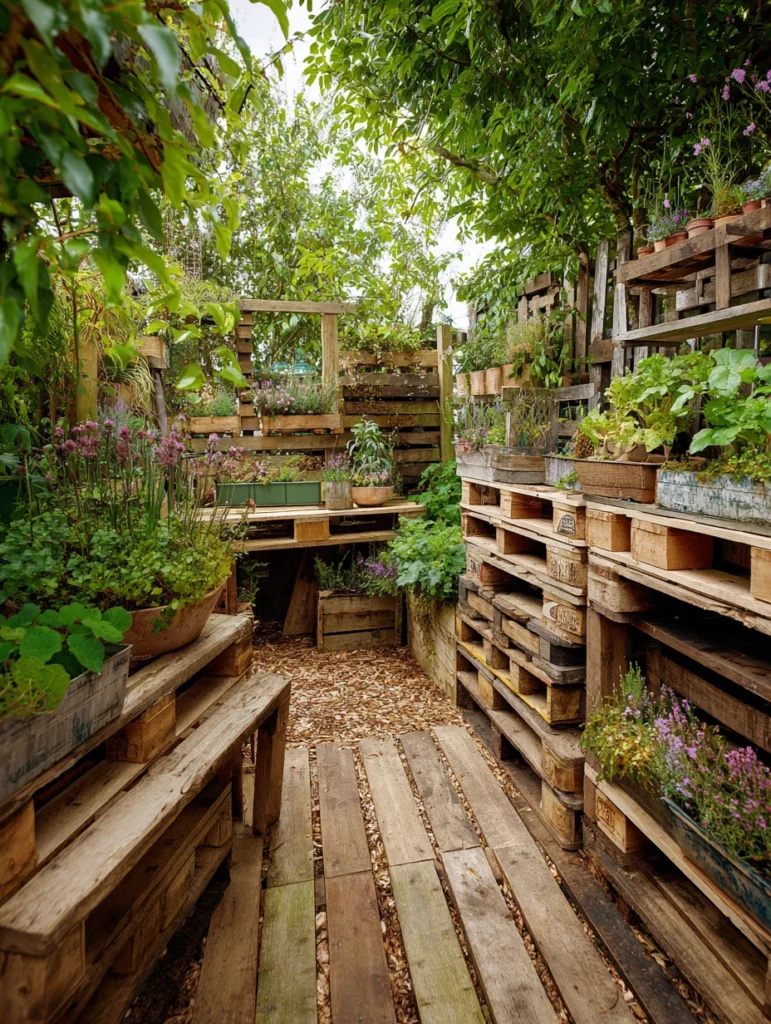
Finding Free Pallets: Businesses receive shipments on pallets frequently and often just want them removed. Check grocery stores, warehouses, factories, or home improvement stores. Post on Facebook or Nextdoor asking if anyone has pallets available. Most people are thrilled someone wants them gone.
Project Ideas: Stand a pallet upright and fill pockets with soil for instant vertical planting. Disassemble pallets and use individual boards for raised beds or garden markers. Lean pallets against fences as trellis structures for climbing plants. Use sturdy pallets as the frame for a potting bench by adding a work surface on top.
Product Spotlight: Heavy-Duty Wood Screws securely join pallet boards without splitting the wood, making structures last season after season. Meanwhile, Exterior Wood Stain protects pallets from weathering and gives them an intentionally designed look, rather than a salvaged appearance.
Read More: How To Create a Beautiful Rose Garden To Inspire You
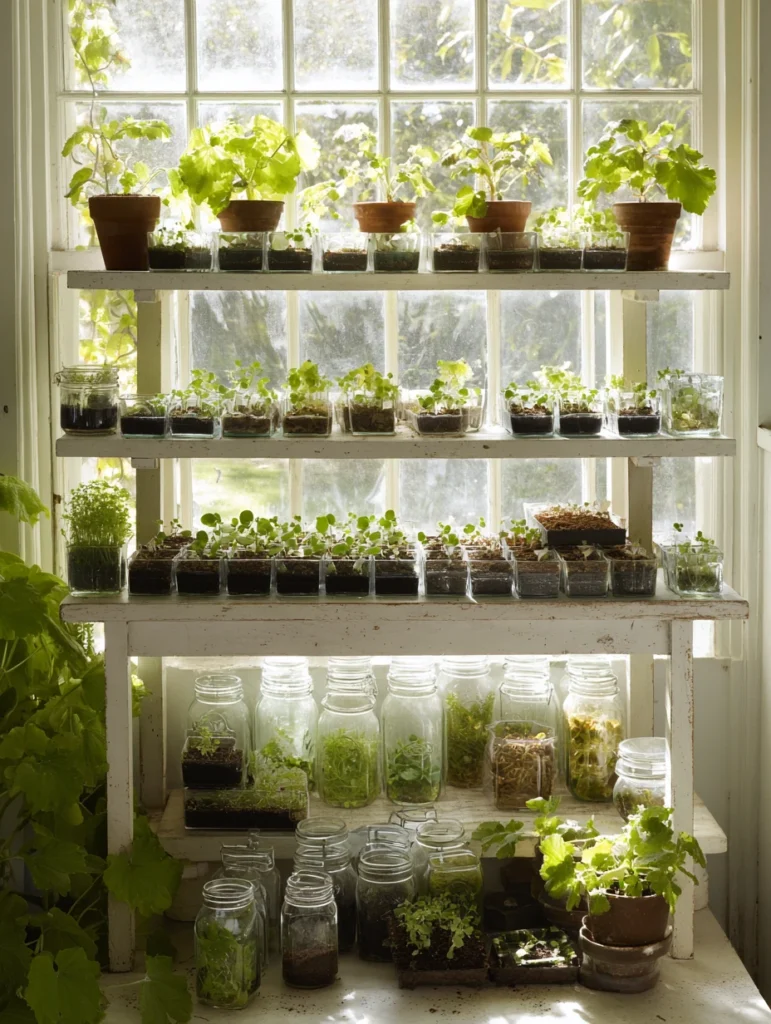
10. Start Seeds Indoors for Massive Savings
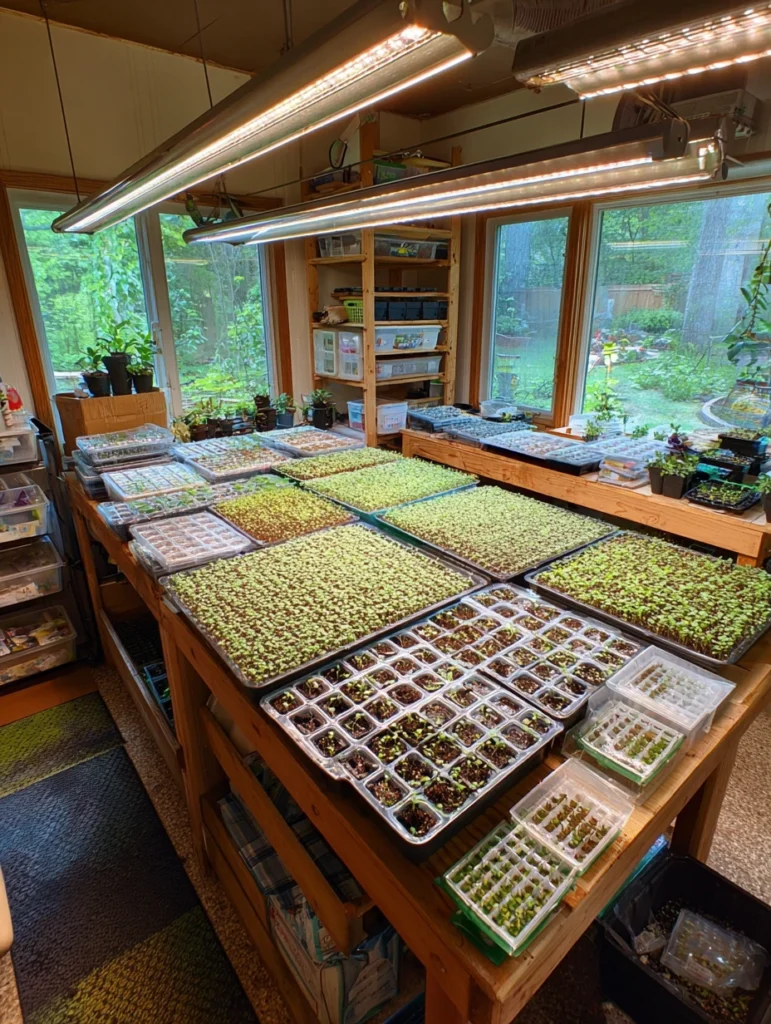
Setup Requirements: You literally just need containers (recycled yogurt cups, egg cartons, or toilet paper tubes work fine), soil, seeds, and a light source. A sunny window works for many plants, but a simple shop light keeps seedlings stocky and healthy. Keep soil moist but not waterlogged – that’s really the primary requirement.
Timing and Varieties: Check seed packets for timing – start seeds indoors 6-8 weeks before your last frost date. Choose fast-growing varieties for beginners – zucchini, tomatoes, and marigolds are nearly foolproof—transplant seedlings outdoors after hardening them off (gradually acclimating to outdoor conditions).
Product Spotlight: Seed Starting Mix drains well and prevents damping-off disease, which kills delicate seedlings, while Grow Light Strips provide full-spectrum light that keeps seedlings compact and healthy until they’re ready to be transplanted outside.
Read More: 21 Japanese Garden Ideas for Serene Outdoor Spaces
11. Build a Bug Hotel for Natural Pest Control
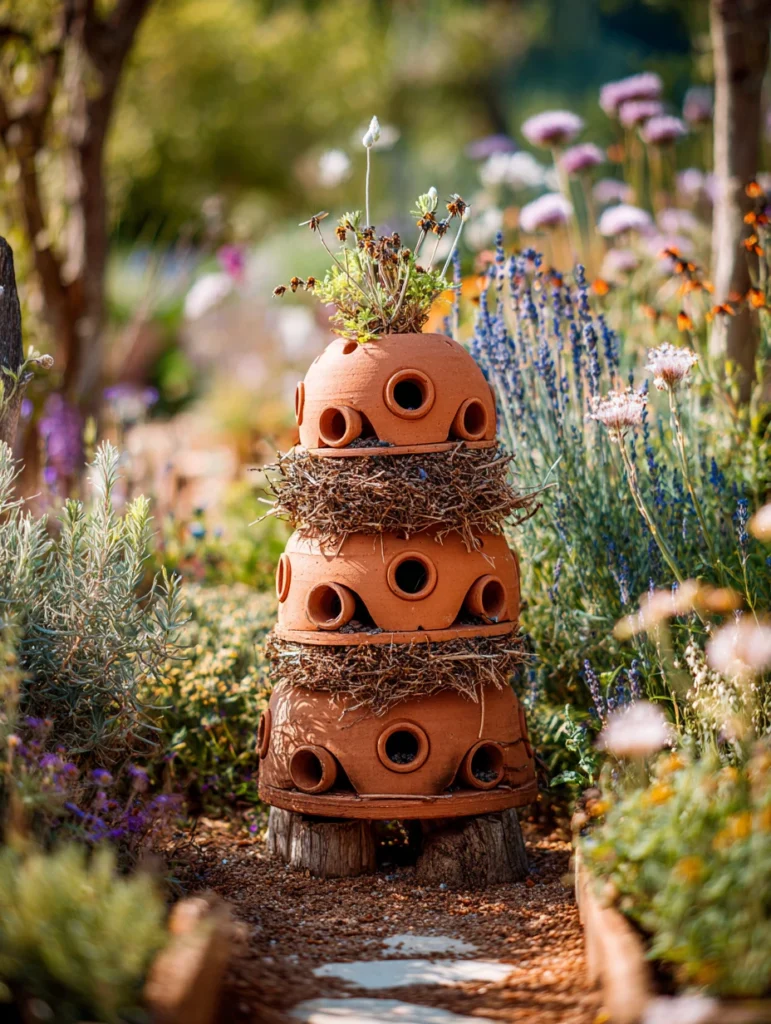
Construction Options: Stack terracotta pots upside down, fill a wooden box with layered materials, or use a cinder block structure. Materials inside should include straw, bark chips, wood blocks with drilled holes, hollow stems, and dry leaves. Leave some gaps and openings for insects to enter and establish.
Placement Matters: Position your bug hotel near the garden where beneficial insects can quickly reach plants. Face openings toward the southeast to catch the morning sun. Make sure it’s stable and won’t tip over – you want it to become a permanent feature. Refresh materials annually to keep them attractive to insects.
Product Spotlight: Layered Bug Hotel Kits come pre-sized with correctly proportioned materials that maximize insect habitation. Meanwhile, Bamboo Cavity Blocks create perfect nesting tunnels for mason bees and other beneficial species, significantly reducing garden pest pressure.
Read More: 21 Stunning Mediterranean Garden Ideas To Inspire You
12. Design Shade Gardens Under Trees
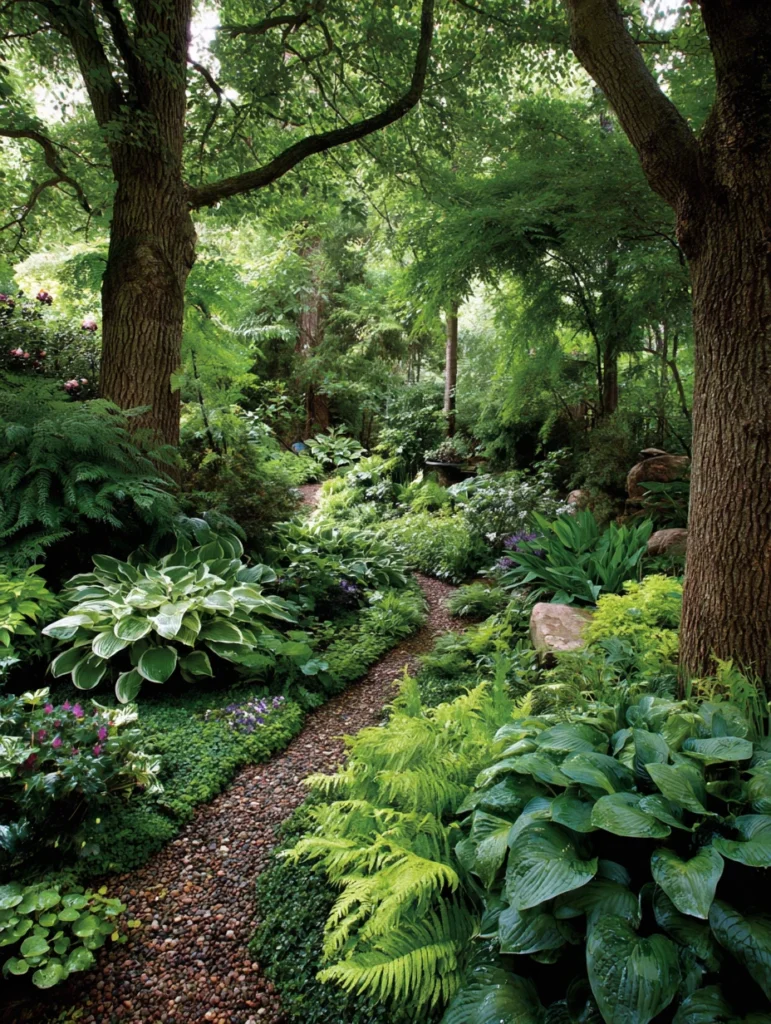
Plant Selection: Hostas come in dozens of varieties and cost $3-8 per plant, growing into substantial specimens. Ferns create texture and movement even without direct sun. Groundcovers like ajuga or lamium fill space densely, preventing weeds from growing. Add interest with shade-tolerant perennials, such as astilbe or heuchera (also known as coral bells).
Preparation and Maintenance: Clear debris from under trees first, then amend the soil with compost since tree roots often deplete nutrients. Once established, shade gardens need less watering than sun gardens due to reduced evaporation. Deadheading spent flowers encourages more blooms from shade-tolerant perennials.
Product Spotlight: Shade Garden Soil Mix is specifically formulated to work in areas with tree root competition and moisture retention issues. Meanwhile, Moisture Meter Tools help you maintain proper hydration in shade gardens, where watering needs differ from those in sunny areas.
Read More: 21 Stunning Italian Garden Ideas That Bring Tuscan Beauty
13. Create Rain Gardens to Manage Drainage Issues
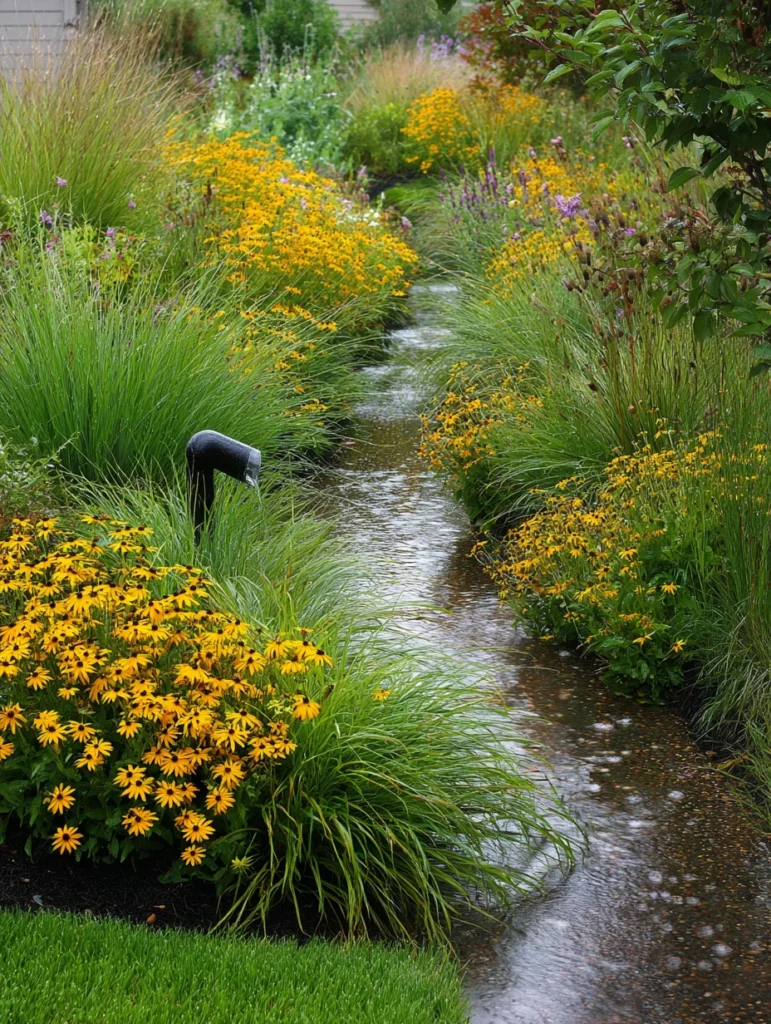
Location and Size: Position rain gardens where water naturally flows, such as at downspout ends, low spots, or along gutters. Size depends on your roof area and rainfall; generally, 4% of the roof area works well. Dig 4-6 inches deep and 3-4 times wider than deep for proper water infiltration.
Plant Selection: Select native plants that are suited to occasional flooding and drought conditions. Sedges, rudbeckia, black-eyed Susans, and native grasses thrive in these conditions. Avoid trees and shrubs, as they don’t tolerate waterlogged conditions. Space plants according to mature size so they fill in completely.
Product Spotlight: The Rain Garden Plant Assortment features species pre-selected for their tolerance to both wet and dry conditions, as well as local adaptation. Meanwhile, the Landscape Drain Sock directs water from downspouts toward your rain garden, capturing sediment before it reaches the planting areas.
Read More: How To Create an English Cottage Garden for Your Flowers
14. Grow a Cutting Garden for Fresh Flowers
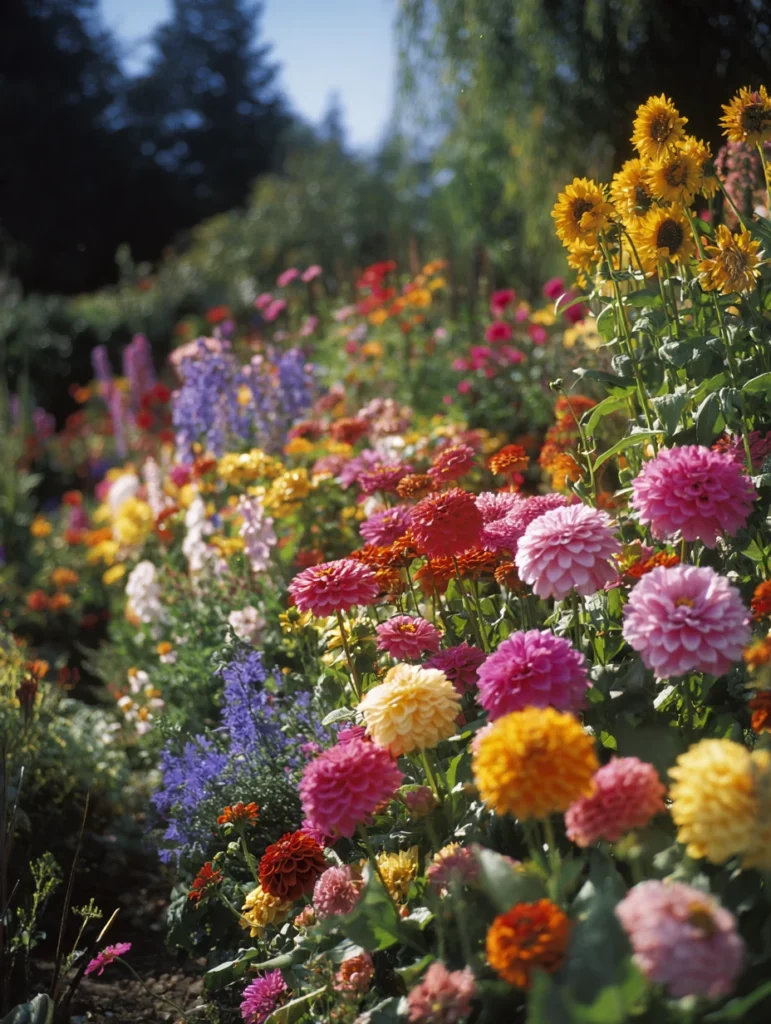
Plant Selection: Zinnias are practically foolproof – $1-2 per seed packet produces hundreds of flowers. Cosmos self-seeds, so you get free plants next year. Sunflowers come in dozens of varieties and grow incredibly fast. Bachelor’s buttons and larkspur add different textures and colors. These all flower prolifically and continue to produce through the fall.
Harvesting Techniques: Cut flowers in the early morning when stems are fully hydrated. Use sharp scissors to make clean cuts just below a leaf node – this encourages branching and more flowers. Change water every few days and recut stems at an angle. Flowers last longer in cool conditions away from fruit.
Product Spotlight: Flower Cutting Shears with bypass blades make clean cuts that don’t crush stems, encouraging continued flowering. Meanwhile, Floral Conditioning Packets dramatically extend vase life and keep homegrown arrangements looking fresh throughout the week.
Read More: 21 Aesthetic Garden Ideas to Transform Your Outdoor Space
15. Build Raised Planting Mounds for Better Drainage
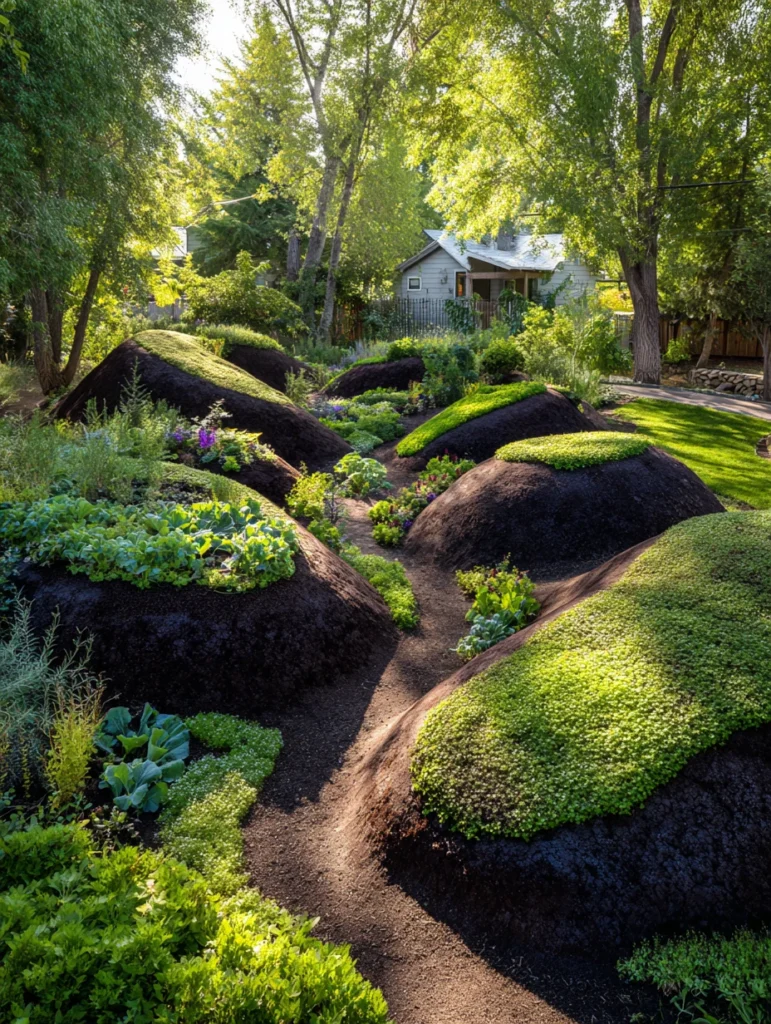
Construction: Mound soil 12-18 inches high in the desired location. Mix in compost or aged manure to improve soil quality and drainage. The diameter should be 2-3 feet to provide plants with adequate rooting space. Water the soil thoroughly after building so it settles. Plant immediately or wait a day if the soil is too wet.
Maintenance: Mounds settle over time, so add soil annually to maintain height. Compost breaks down, gradually improving soil structure. After 2-3 years, mounds naturally integrate into the surrounding landscape while maintaining better drainage than flat ground.
Product Spotlight: Compost-enriched garden soil, blended with perlite for drainage, creates the perfect mound medium that holds moisture without waterlogging. A Soil Testing Kit helps you understand your existing soil, allowing you to amend it correctly rather than guessing.
Read More: 21 Beautiful Scottish Garden Ideas Inspired by the Highlands
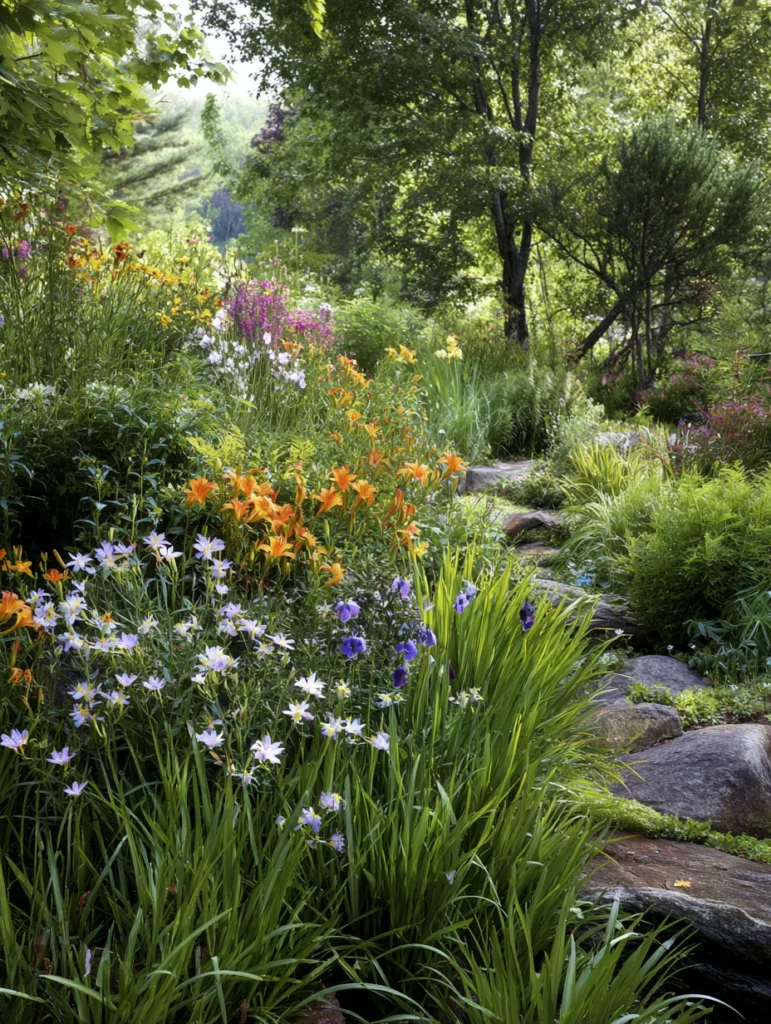
16. Design Perennial Gardens for Permanent Coverage
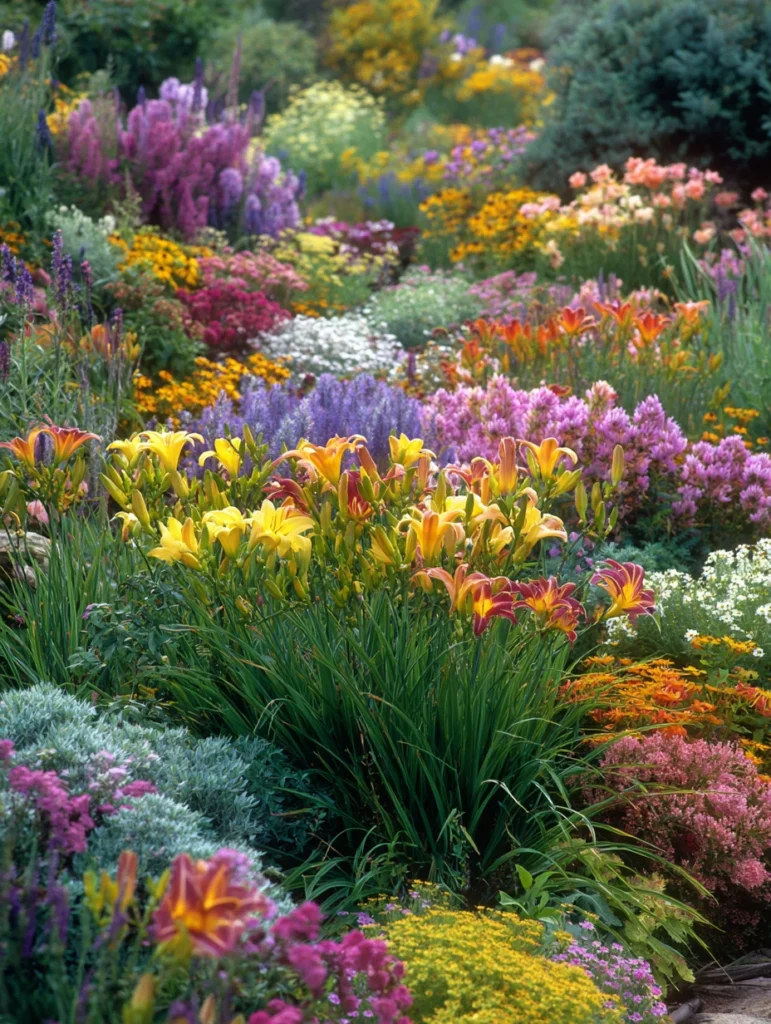
Starter Perennials: Daylilies cost $2-5, bloom reliably, and come in hundreds of colors; coreopsis flowers prolifically and costs similar amounts. Black-eyed Susans (Rudbeckia) are nearly indestructible. Sedums thrive in poor soil and require minimal water. All of these establish quickly and spread over time.
Garden Workflow: Start with 3-5 varieties planted in groups for visual impact. Space them appropriately for mature size – they’ll look sparse initially but fill in within 1-2 seasons. Cut back in fall or early spring, depending on your region. Divide overcrowded plants every 3-4 years to create free new plants.
Product Spotlight: Perennial Plant Food, formulated to support blooming and root development, creates stronger plants that establish faster and produce more flowers. Meanwhile, the Garden Divider Tool makes splitting established clumps easy, allowing one plant to become multiple plants for free expansion.
17. Incorporate Groundcovers to Reduce Mowing
Planting Strategy: Remove grass or sod where you want groundcover, amend the soil with compost, then plant groundcover plugs or small divisions. Space according to mature spread – typically 6-12 inches apart, depending on variety. This appears sparse at first, but fills in within a season. Water consistently until established, then most groundcovers are drought-tolerant.
Variety Selection: Sedums thrive in poor soil and maintain a sculptural appearance year-round. Creeping thyme tolerates foot traffic and has a delightful aroma. Ajuga spreads aggressively (which you want) and has pretty purple flowers. Lamium prefers shade but works wonderfully under trees and shrubs.
Product Spotlight: The Groundcover Plug Collection arrives ready to plant with established root systems that establish faster than seeds. Meanwhile, the Landscape Weed Barrier, placed underneath the groundcover, prevents grass from pushing through while the groundcover establishes, dramatically reducing the need for hand-weeding.
18. Start a Windowsill Herb Garden for Kitchen Use
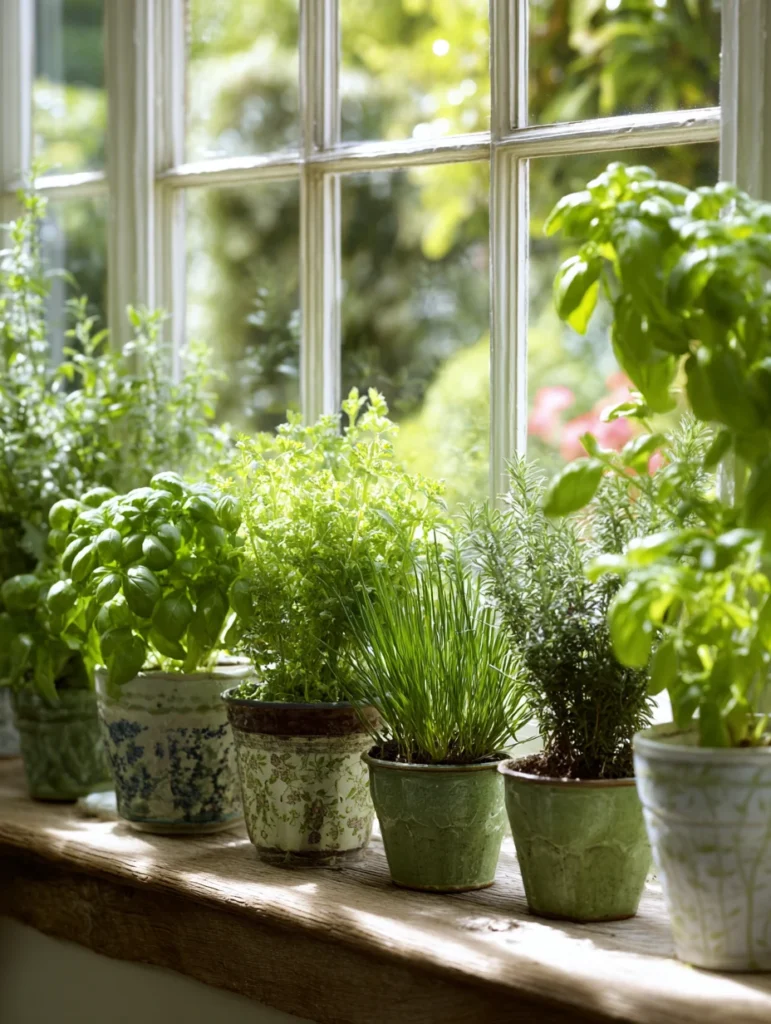
Set up: Use any container with drainage holes, such as recycled cups, small pots, or mason jars. Fill the pot with potting soil, plant the herbs, and water them when the soil has dried. Place the pot in a south- or west-facing window. Most herbs require at least 6 hours of direct sunlight daily. Rotate containers occasionally so all sides get light.
Harvesting and Care: Pinch off leaf tips regularly – this encourages branching and bushier growth, while also providing you with fresh herbs to use. Never remove more than one-third of the plant at a time. Most herbs can be harvested continuously through winter indoors. Refresh the soil annually, as container herbs deplete nutrients faster than those in ground gardens.
Product Spotlight: The Windowsill Herb Garden Kit includes sized containers, herbs, and instructions that take the guesswork out of growing. Meanwhile, the Self-Watering Plant Spikes automatically release water as the soil dries, eliminating the guesswork and preventing underwatering on busy days.
19. Create Wildlife Habitats with Native Plants
Plant Selection: Research native plants suited to your USDA zone and local conditions. Many state native plant societies publish lists with growing information. Visit local nature centers or parks to see native plants in their element. Local nurseries often carry native plants and offer the best advice tailored to your region.
Garden Design: Plant native species in groups and layers – tall trees in the back, understory shrubs in the middle, and native herbaceous plants and groundcovers in the front. This creates natural-looking communities that wildlife recognizes and utilizes. Vary bloom times so that food sources are available from spring through fall.
Product Spotlight: The Native Plant Seed Collection for your region offers multiple species that support local wildlife while requiring minimal maintenance. The Native Planting Guide, tailored to your specific zone, eliminates the guesswork from selection and placement, ensuring success.
20. Build Trellises and Arbors from Branches and Salvage
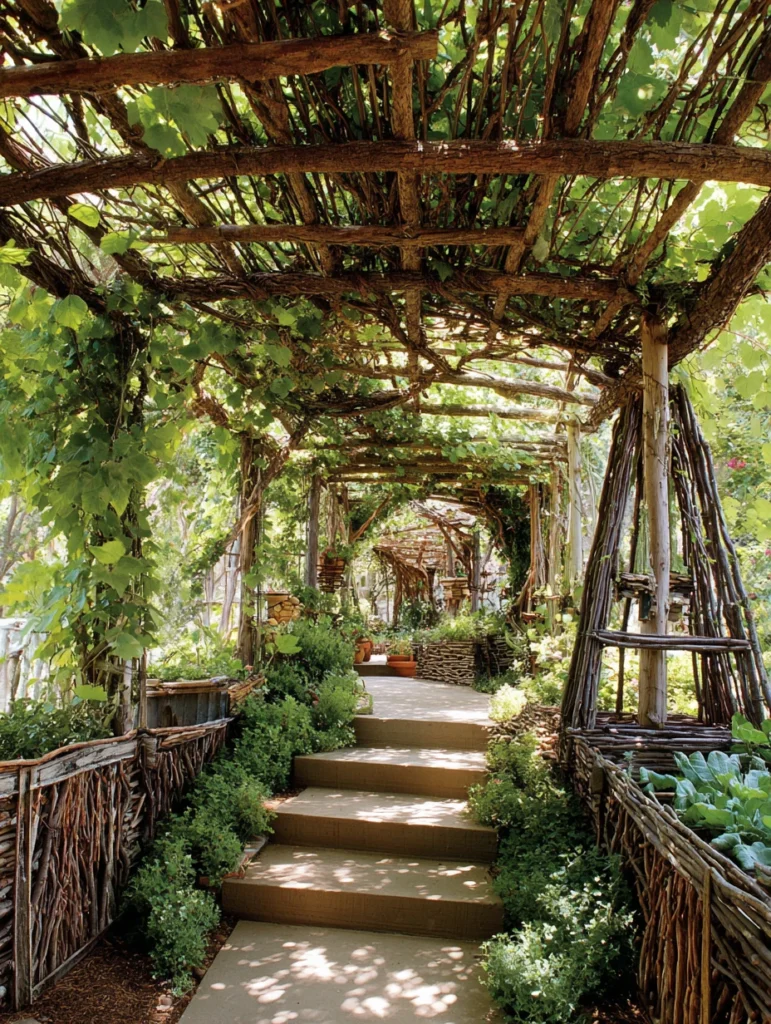
Simple Construction: Lash branches together using natural twine or wire to create teepee structures for tomatoes or beans. Build simple grids from saplings or narrow wood scraps nailed into frames. Even just leaning tall branches against fence lines creates instant climbing plant supports.
Placement Strategy: Position trellises to create vertical gardens, shade structures, or visual screens. Support vining vegetables, such as tomatoes, beans, peas, and cucumbers. Grow decorative vines like clematis, morning glories, or ivy for living privacy screens.
Product Spotlight: Heavy-Duty Garden Twine holds branch structures securely without cutting into wood as it grows, while Trellis-Growing Clips guide plants to grow along structures efficiently without tying knots repeatedly.
21. Design Seating Areas and Rest Spots

Budget Seating Options: Hunt for vintage wooden chairs at thrift stores or estate sales – paint them and they’re instantly garden-appropriate. Salvaged benches from community groups or online marketplaces cost practically nothing. Build simple log seating by placing planks across stacked logs or cinder blocks. Even a cleared space with garden soil becomes a meditation spot.
Creating Ambiance: Position seating to view focal points, such as flower beds, water features, or inspiring corners. Plant fragrant flowers nearby, such as roses, gardenias, or jasmine. Add soft lighting if possible, using solar lights or candles. Design seating areas to feel separated from the yard bustle, enclosed by plants, or positioned in corners out of view from the house.
Product Spotlight: Outdoor Cushion Covers protect salvaged furniture from the weather and add color and comfort without the need for expensive new seating. At the same time, Solar Pathway Lights create ambiance and safety around seating areas without incurring additional electricity costs.
Final Thoughts
There you have it – 21 ways to create a garden that honestly looks like you spent way more money than you actually did. The real secret is that gardens don’t require fancy equipment or expensive installations – they need creativity, patience, and willingness to work with what’s available around you. Start with just one or two ideas that excite you, then build from there.
Your budget garden becomes even better over time as plants establish and spread. The best part? Nobody has to know your stunning garden costs just a fraction of what they’d imagine. So get out there, dig in that dirt, and prove that beautiful gardens come from intention, not just money.