A hippie garden brings together natural beauty, creative reuse, and relaxed outdoor living. This style draws from 1960s counterculture values that favored organic growing methods and colorful, unstructured landscapes over formal lawns. You can create this type of space on any budget by using recycled materials, native plants, and handmade touches.
These garden ideas focus on building a peaceful outdoor area where you can connect with nature through wildflowers, upcycled decorations, comfortable seating spots, and simple features that support local wildlife. The approach works well whether you have a large backyard or a small yard. You don’t need expert gardening skills to get started.
1. Create a colorful wildflower meadow for natural beauty
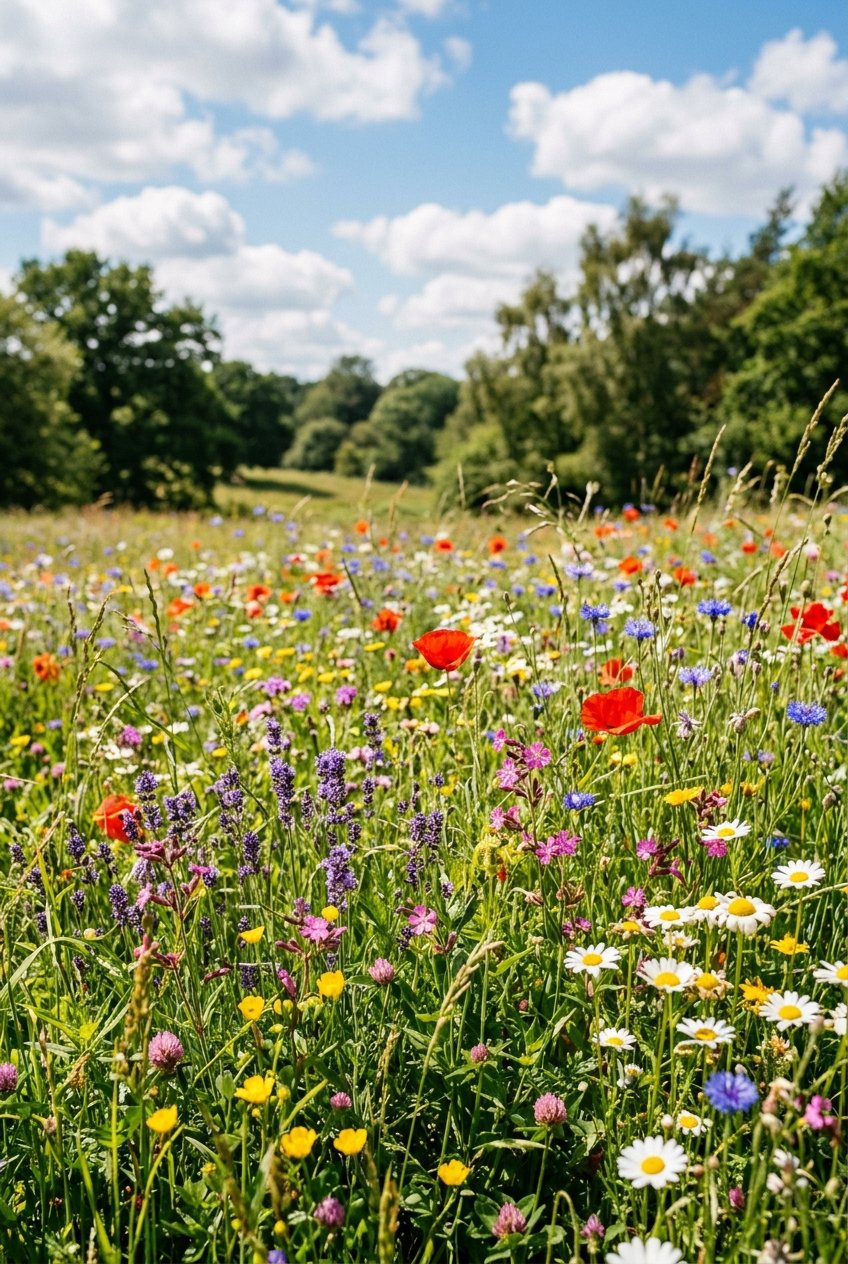
A wildflower meadow brings untamed beauty to your hippie garden without demanding much work. You can plant native wildflower seeds that naturally thrive in your area, creating a low-maintenance space that changes with the seasons.
Start by clearing a patch of grass in spring or fall. Scatter a mix of native wildflower seeds like coneflowers, black-eyed Susans, yarrow, and poppies across the prepared soil. Let them grow freely without strict patterns or rows.
These meadows need less care than traditional lawns. They attract bees, butterflies, and other helpful pollinators to your garden. The roots also improve soil health and help water soak into the ground better.
Your wildflower meadow will create a colorful display that shifts throughout the growing season. Different flowers bloom at different times, giving you an ever-changing landscape. This natural approach captures the free-spirited feel of a hippie garden while supporting local wildlife and the environment.
2. Incorporate recycled tire planters painted in bright hues
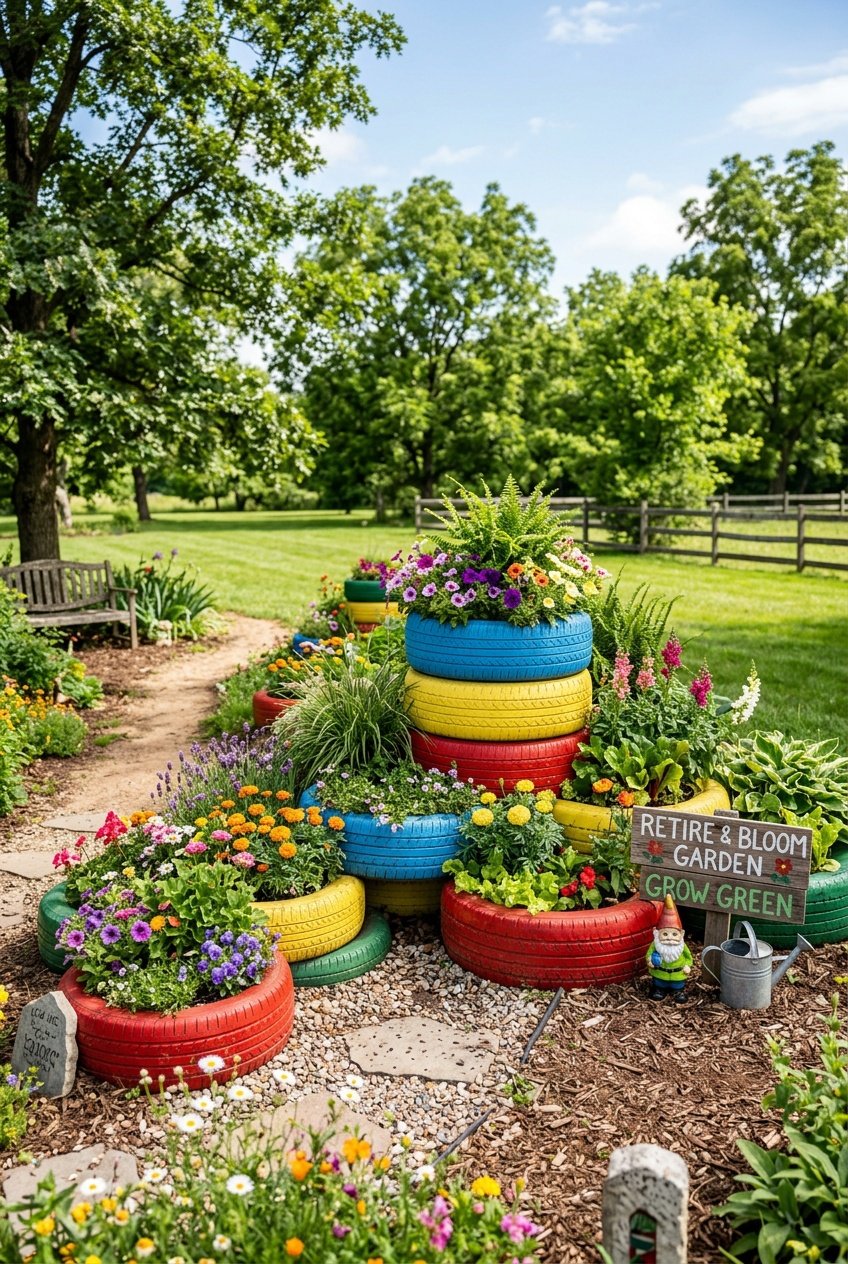
Old tires make excellent planters for your hippie garden while keeping waste out of landfills. You can find used tires at auto shops or tire centers, often for free.
Paint your tires in vibrant colors like pink, orange, yellow, purple, and turquoise. These bold hues create the cheerful, free-spirited atmosphere that defines hippie garden style. You can use exterior paint or spray paint designed for rubber surfaces.
Stack multiple tires in different colors to build tiered planters that add height and visual interest to your space. Single tires work well too, placed along pathways or clustered in groups of three or five.
Fill your painted tire planters with colorful flowers, herbs, or trailing plants. The contrast between bright tire colors and green foliage creates an eye-catching display. You can also add peace signs or flower designs to personalize your planters.
These recycled tire planters are durable and weather-resistant. They work on patios, balconies, or directly in garden beds. The flexible rubber material insulates plant roots from temperature changes better than traditional pots.
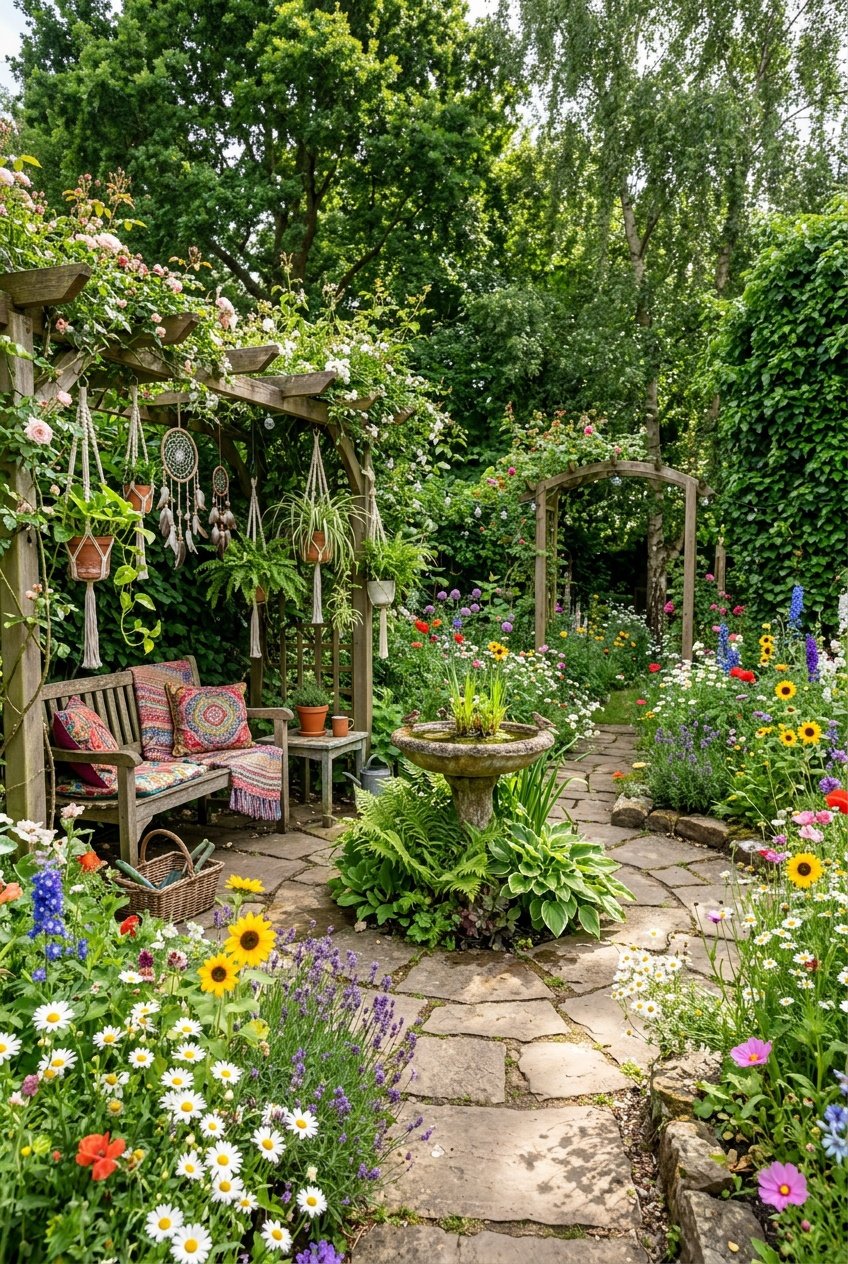
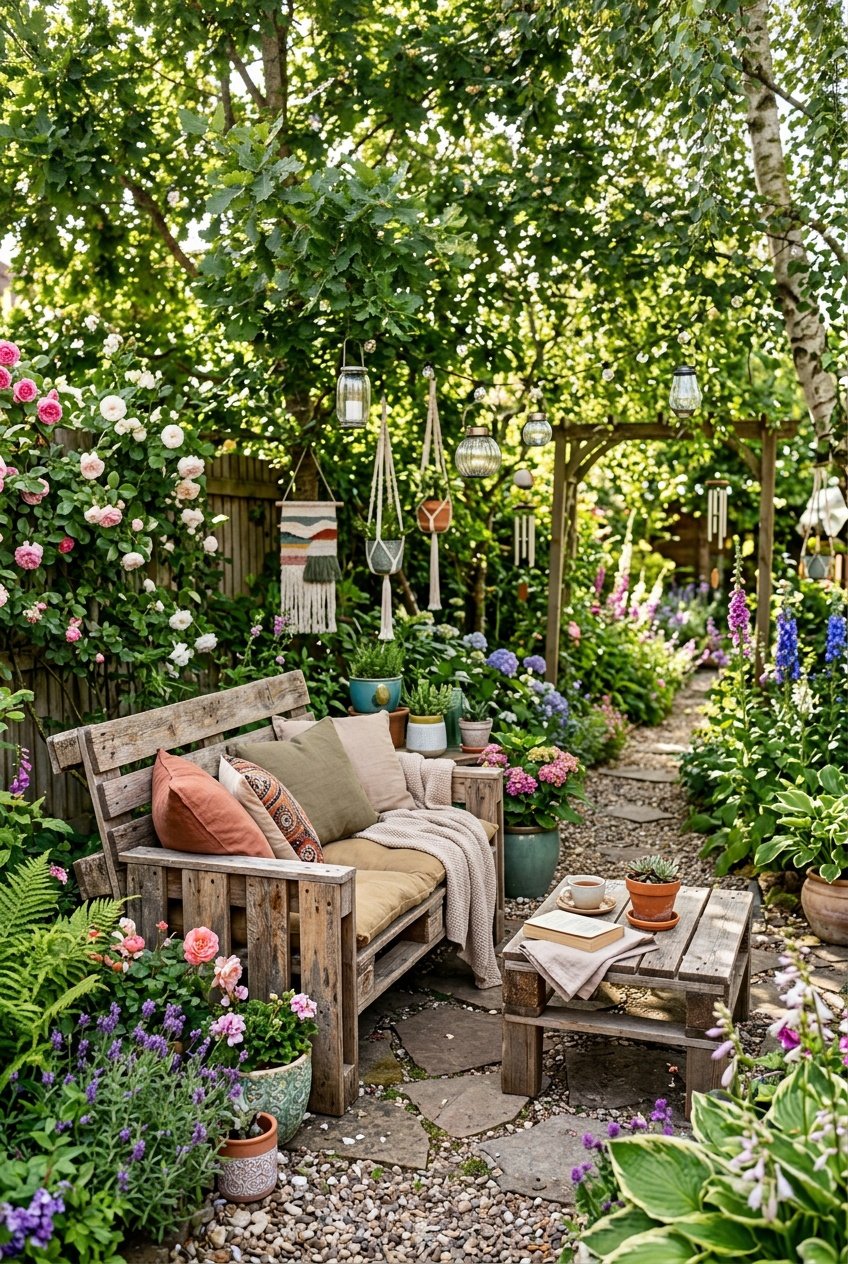
3. Build a cozy hammock nook with macramé details
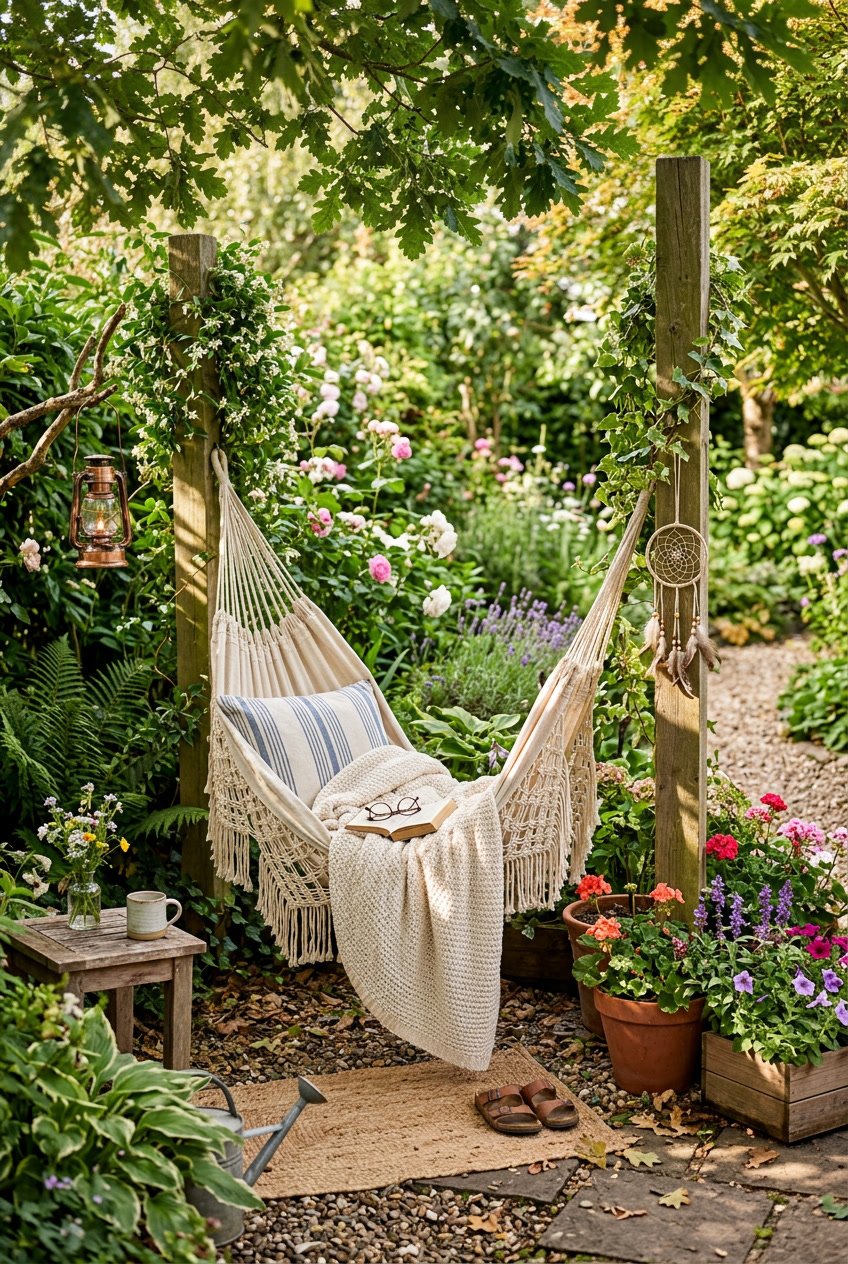
A macramé hammock creates the perfect spot to relax in your hippie garden. The handmade knotted design adds a bohemian touch that fits naturally with the free-spirited style.
You can hang your hammock between two sturdy trees or install posts if you don’t have trees in the right spots. Choose a quiet corner of your garden where you can read or take naps.
Macramé hammocks come in different styles. Some feature simple knotwork while others have elaborate patterns and fringe details. The natural cotton cord used in macramé adds texture and visual interest to your space.
If you enjoy crafting, you can make your own macramé hammock using basic knotting techniques. Many free patterns are available online for beginners. The project takes time but results in a unique piece for your garden.
Add comfort with colorful throw pillows and a soft blanket. String lights or wind chimes nearby create more ambiance. Plants in hanging baskets around your hammock nook complete the peaceful retreat.
The neutral tones of macramé blend well with greenery and flowers. This timeless addition to your hippie garden provides a functional art piece you’ll use for years.
4. Use upcycled wooden pallets for rustic garden furniture
Wooden pallets offer a simple way to create rustic garden furniture without spending much money. You can find free or cheap pallets at shipping companies, behind stores, or through online marketplace listings.
These versatile materials work well for many outdoor furniture projects. You can build benches, tables, chairs, and garden lounges with basic tools. Most pallet furniture projects need minimal woodworking skills.
The natural wood texture of pallets fits perfectly with hippie garden aesthetics. The weathered appearance adds character to your outdoor space. You can leave the wood in its natural state or paint it with eco-friendly outdoor stains.
Before starting your project, inspect pallets carefully for damage or chemical treatments. Look for pallets marked “HT” which means heat-treated rather than chemically treated. Sand rough edges to prevent splinters.
Simple pallet benches make great seating around fire pits or meditation areas. Stack and secure pallets to create tiered plant stands or outdoor bars. You can add cushions made from recycled fabrics to increase comfort.
These upcycled furniture pieces reduce waste while giving your garden a laid-back, bohemian feel. The projects are beginner-friendly and customizable to match your garden’s style.
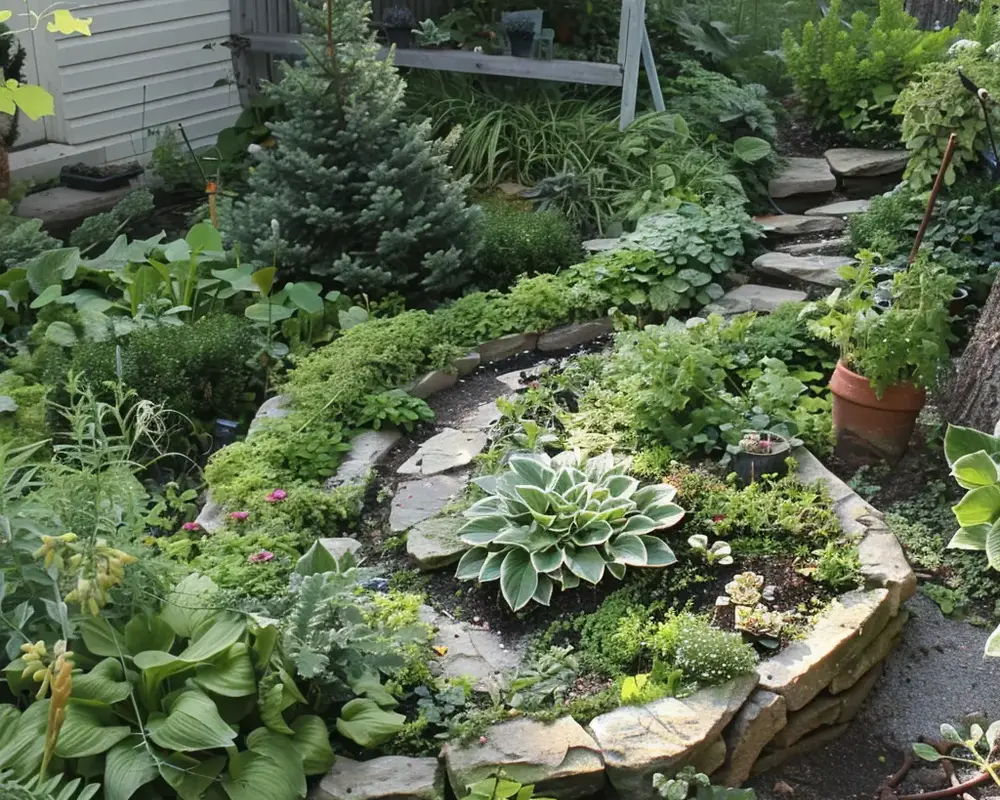
5. Design a spiral herb garden for visual interest and function
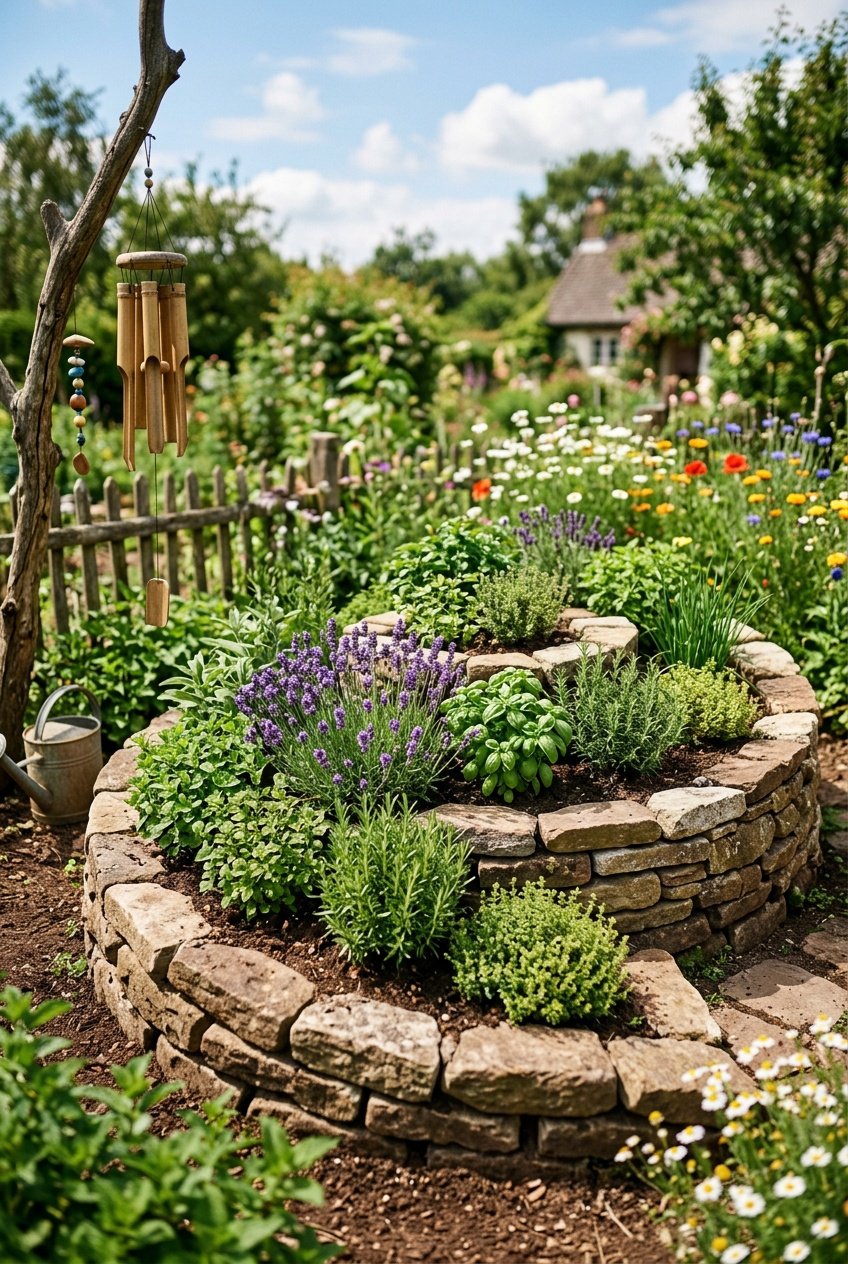
A spiral herb garden is a three-dimensional structure that rises from the ground in a circular spiral shape. This design maximizes your growing space while creating a striking focal point in your garden.
The spiral shape creates multiple microclimates in one compact area. The top of the spiral stays warmer and drier, which works well for herbs like rosemary and thyme. The bottom stays cooler and holds more moisture, making it perfect for parsley and cilantro.
You can build your spiral using stones, bricks, or recycled materials. Start with a base about four to six feet wide and build upward in a spiral pattern. The structure typically reaches about three feet high at its center.
This permaculture technique works especially well in small yards where space is limited. You’ll find it easier to access your herbs since they grow at different heights around the spiral. The vertical design also improves drainage naturally as water flows down from the top to the bottom.
6. Install solar-powered fairy lights for ambient evening glow
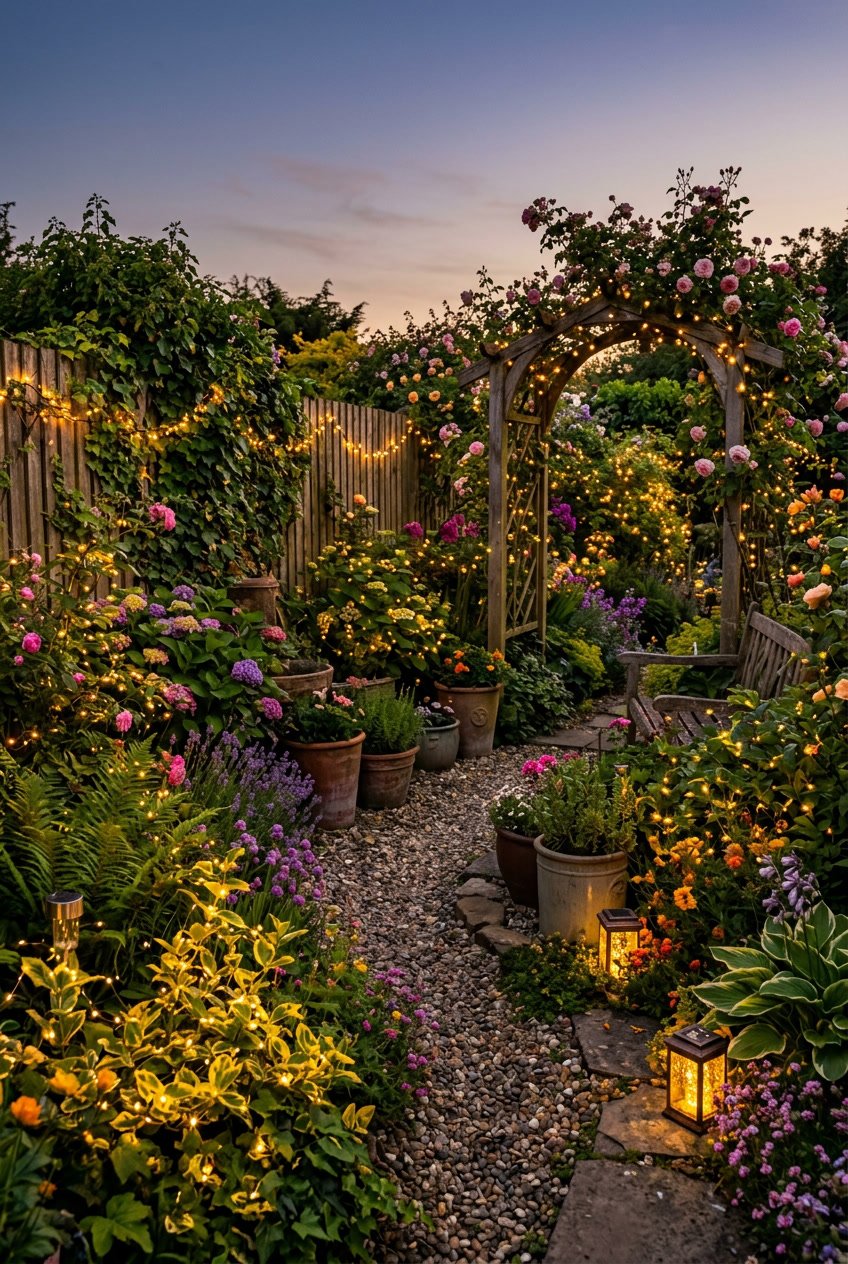
Solar-powered fairy lights add a gentle, magical touch to your hippie garden without increasing your electricity bill. These eco-friendly lights charge during the day and automatically illuminate your space after sunset.
You can drape them along garden pathways to create a safe walking route at night. Wrap them around tree trunks and branches to highlight your favorite plants. String them across pergolas or between posts to define outdoor seating areas.
Choose lights with adequate battery capacity for your climate. Most solar fairy lights need about six to eight hours of direct sunlight to fully charge. Position the solar panel in a sunny spot for best results.
Installation takes just minutes. Most models come with stakes or clips that secure the light strands in place. No wiring or electrical knowledge is needed.
These lights work well in various garden styles while maintaining the natural, peaceful vibe of hippie-inspired spaces. The soft twinkle creates atmosphere for evening gatherings or quiet meditation time. Regular cleaning of the solar panels keeps them working efficiently throughout the seasons.
7. Craft a meditation circle using natural stones
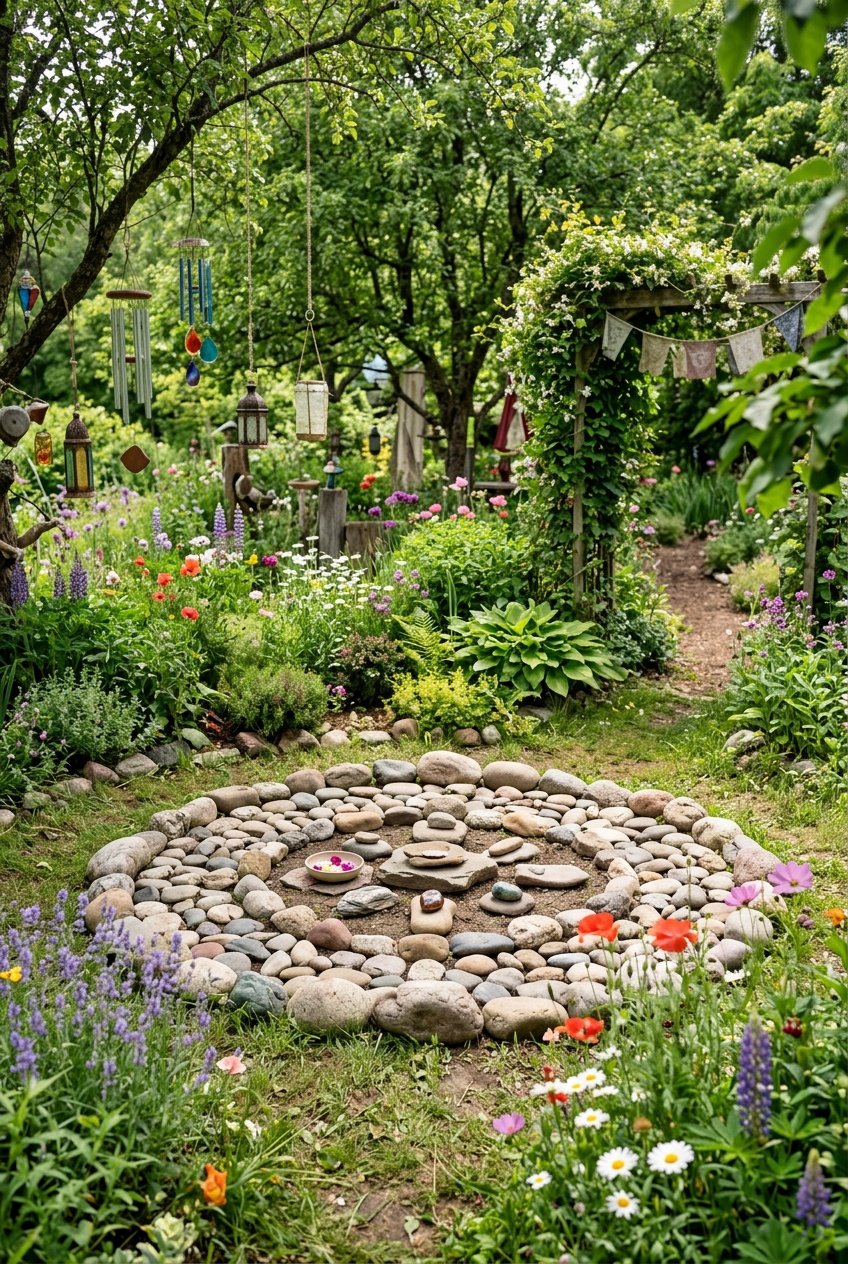
A stone meditation circle creates a dedicated space for mindfulness in your garden. You can use flat stones of varying sizes arranged in a circular pattern. This simple design marks a natural area for reflection and quiet time.
Start by finding smooth, flat stones from a garden center or nearby beach. Arrange them in a circle large enough to sit inside comfortably. The circular shape encourages focus and creates a boundary between your meditation space and the rest of your garden.
You can enhance your circle with additional natural elements. Place flower petals between stones or add a layer of sand inside the circle. Some people prefer to keep their meditation circle minimal with just the stones.
The earthy materials fit naturally into a hippie garden‘s organic aesthetic. Your stone circle becomes a permanent fixture that requires little maintenance. You just need to replace any displaced stones after heavy weather.
This meditation space works well near other garden features like wildflower patches or under a shaded tree. The circular arrangement provides a grounding element that connects you to nature during your practice.
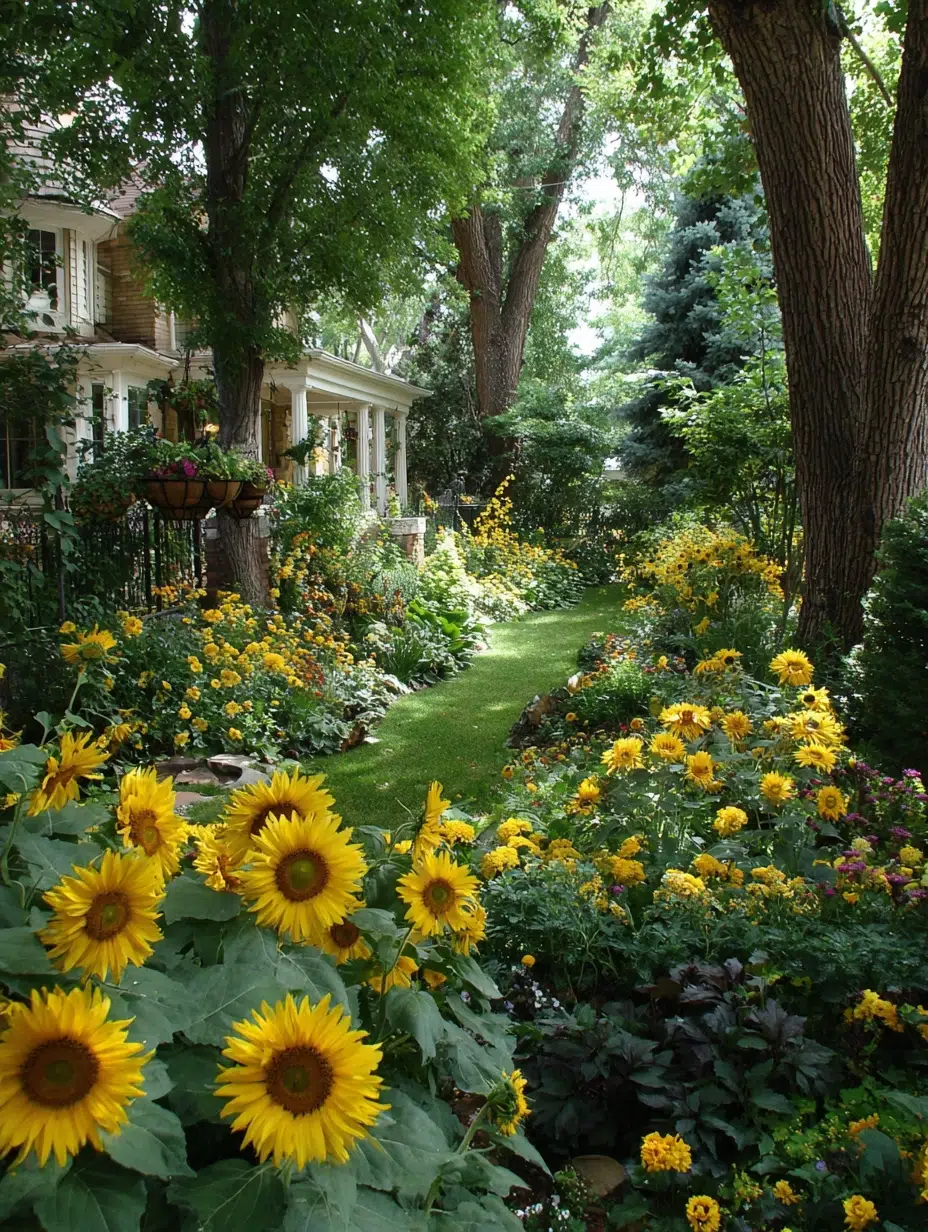
8. Plant native wildflowers to attract pollinators
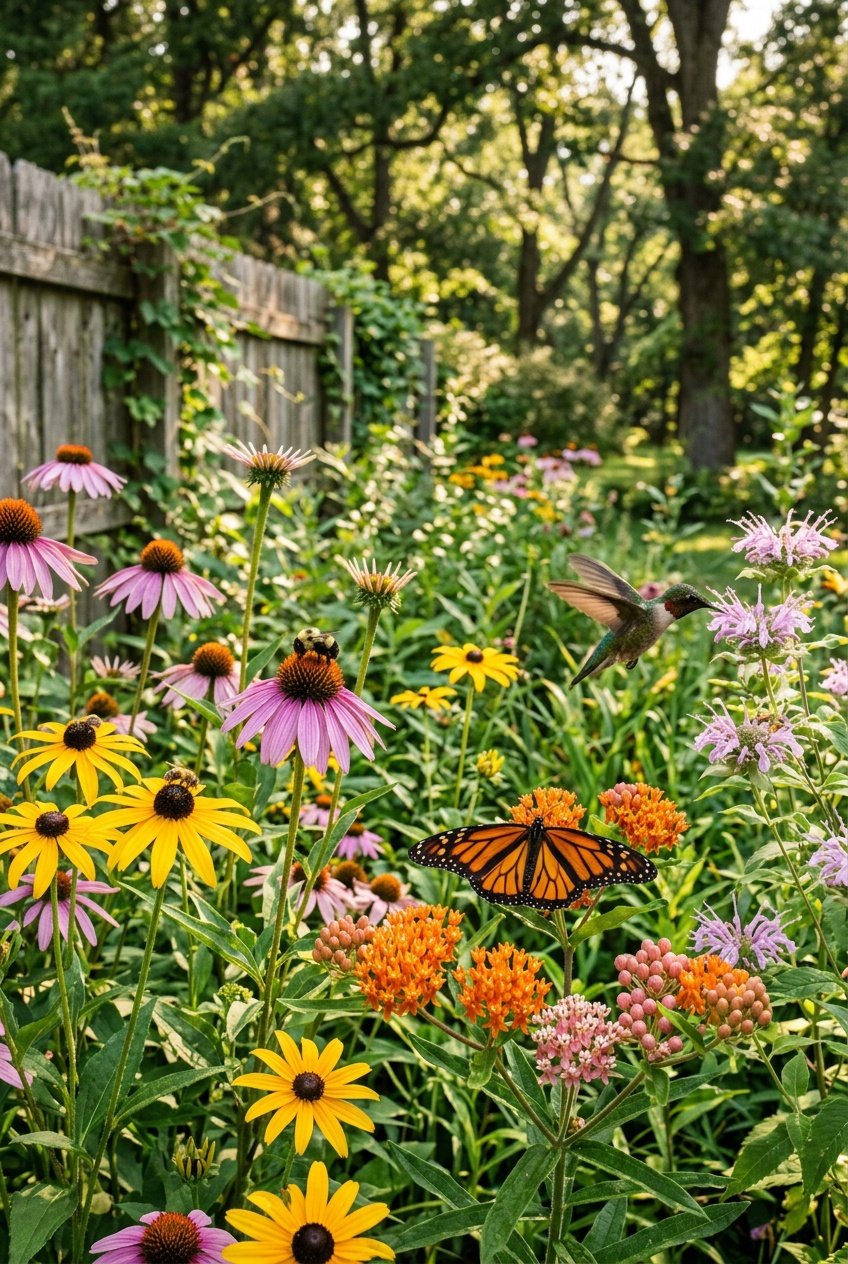
Native wildflowers bring life to your hippie garden while supporting local bees, butterflies, and hummingbirds. These plants have grown alongside pollinators in your area for thousands of years, making them a perfect match.
Local wildflowers provide the right nectar and pollen that pollinators need. Their flower shapes, colors, and bloom times align with what local insects and birds look for when feeding.
You don’t need to work hard to maintain native wildflowers. They already know how to thrive in your local soil and climate. Most varieties need less water and care than non-native plants once they get established.
Choose a mix of species that bloom at different times throughout the growing season. This gives pollinators a steady food source from spring through fall. Plant them in clusters rather than single flowers to make it easier for pollinators to find them.
Native wildflowers also reduce your garden’s environmental impact. You won’t need as many pesticides or fertilizers, which can harm the pollinators you’re trying to help. Your garden becomes a safe space where nature can do its thing.
9. Add whimsical wind chimes made of bamboo or shells
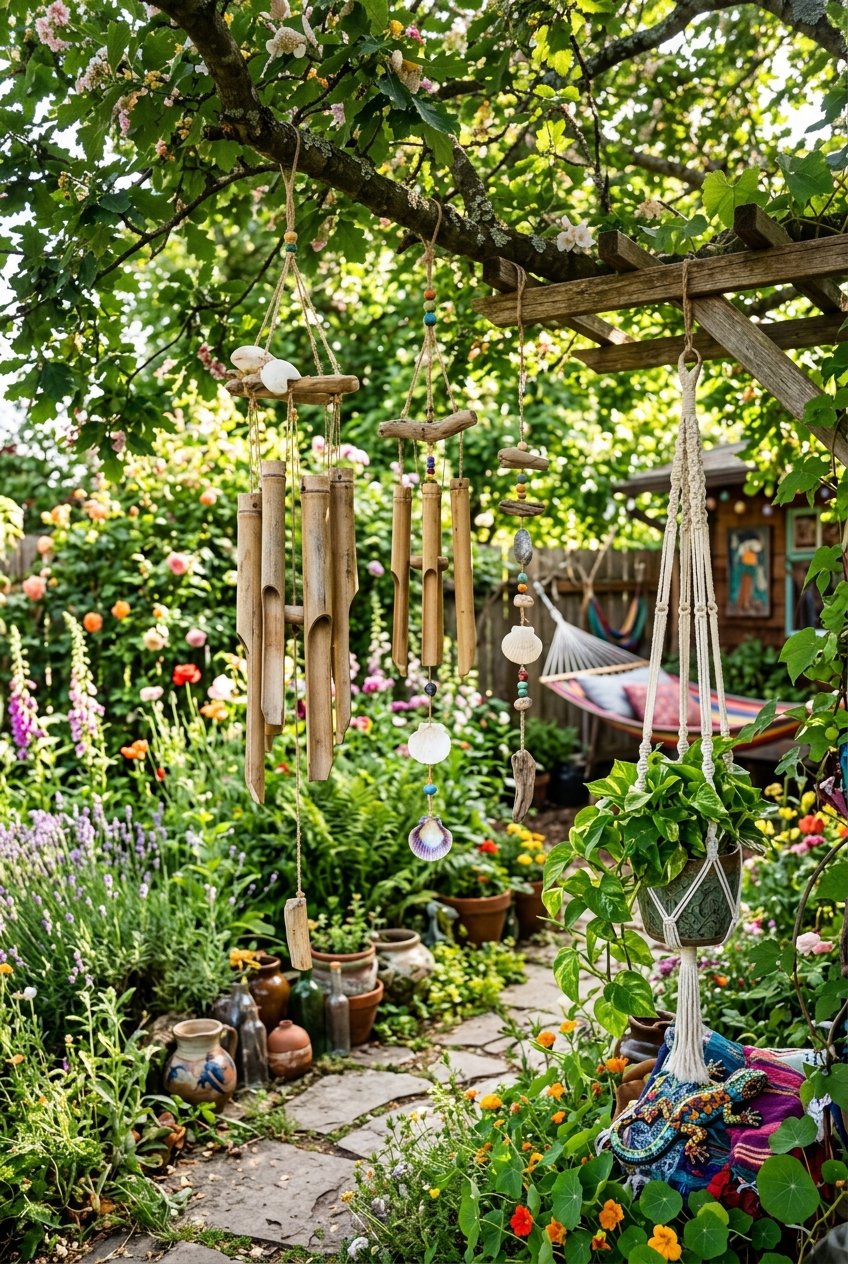
Wind chimes bring gentle sounds to your garden while adding visual interest. Bamboo and shell options fit perfectly with hippie garden themes because they use natural materials.
Bamboo wind chimes create soft, mellow tones when the breeze passes through. You can make your own by cutting bamboo pieces to different lengths and hanging them from a wooden ring or branch. Each piece will produce a unique sound based on its size.
Shell wind chimes work well if you want a coastal or beach-inspired feel. Collect shells of various sizes and drill small holes near the edges. String them together with fishing line or natural twine.
Both types of chimes are easy to customize. You can add beads, driftwood, or small pieces of sea glass between the main elements. Hang your wind chimes near seating areas where you can enjoy their sounds.
These natural materials weather beautifully over time. They blend into garden spaces without looking too polished or manufactured. Place multiple wind chimes throughout your garden to create layers of peaceful sound.
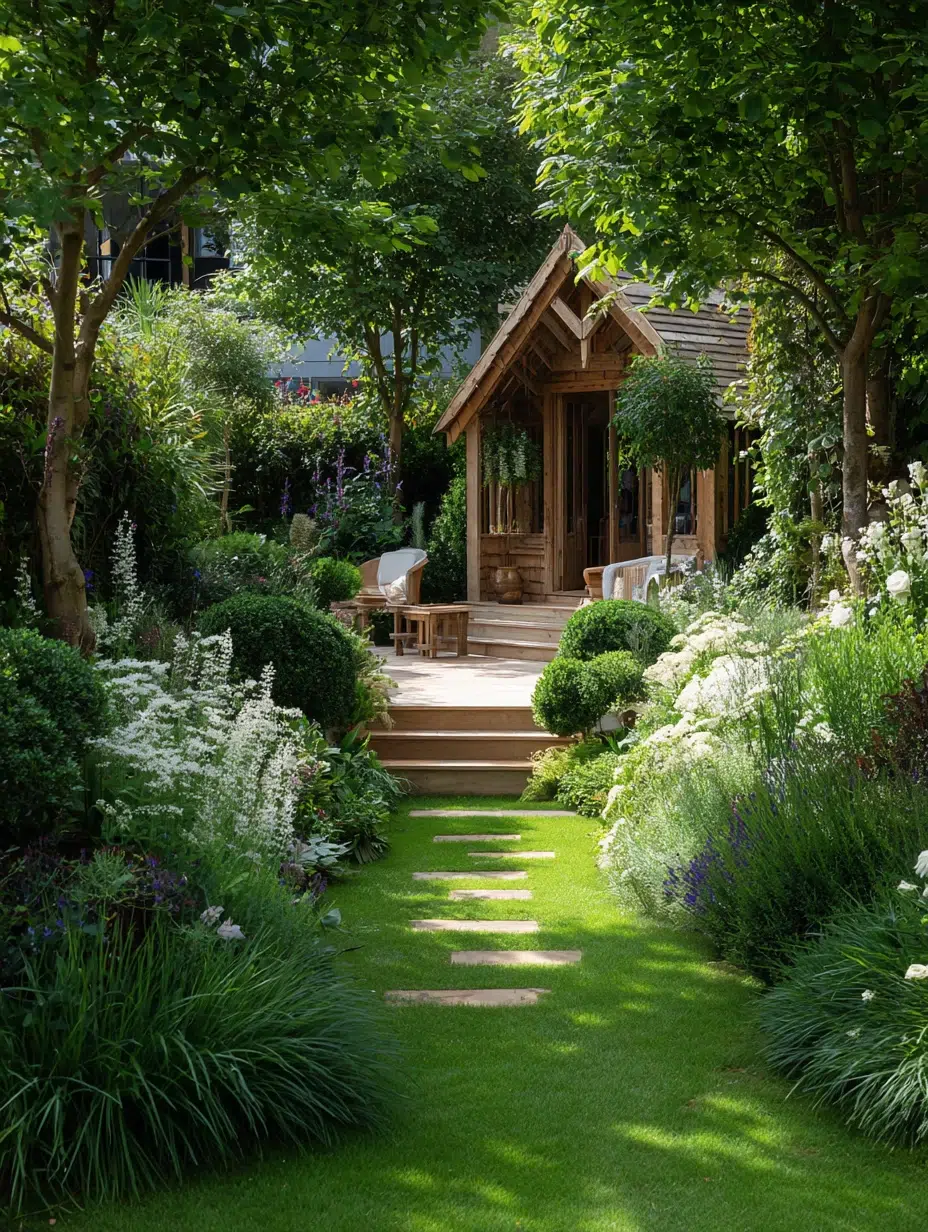
10. Create a boho-inspired teepee or tent for relaxation
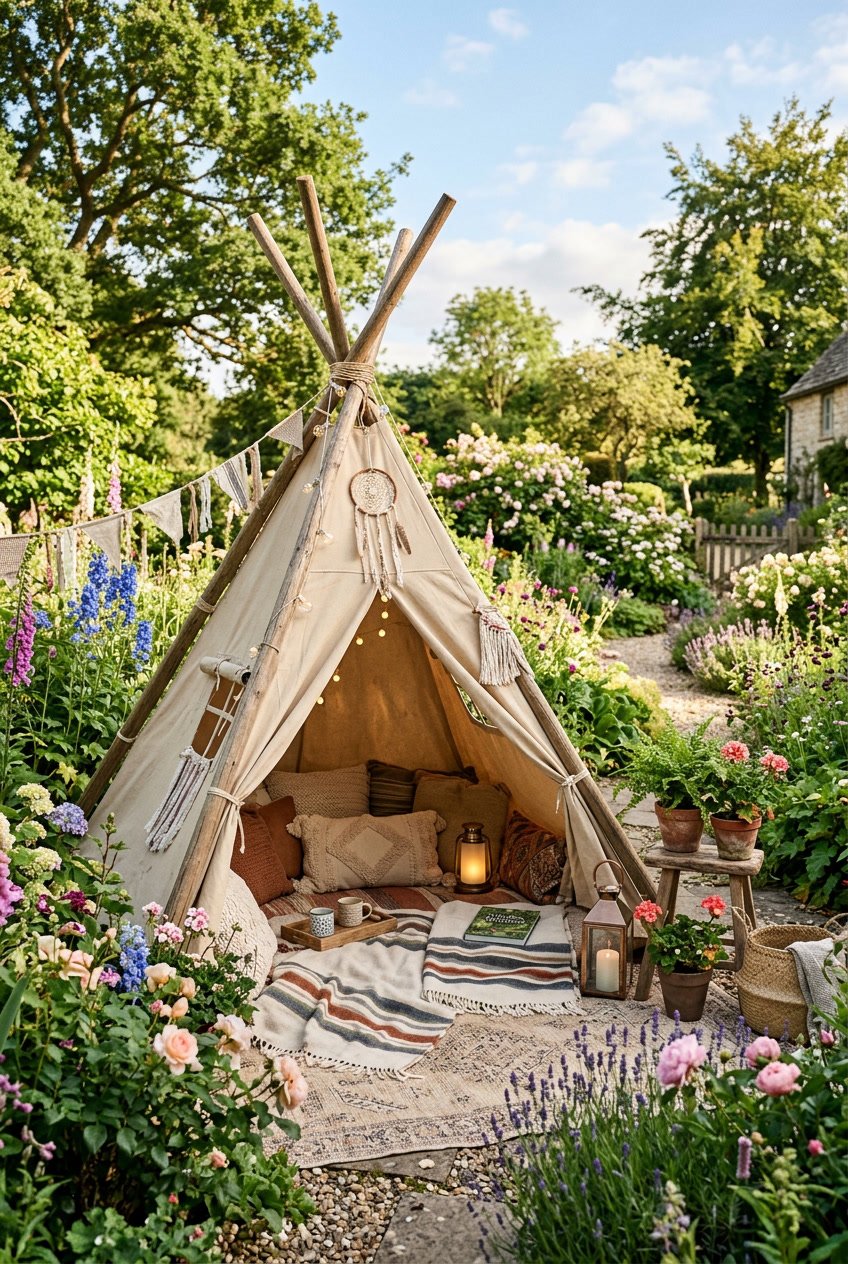
A teepee or tent adds a peaceful spot to your garden where you can read, meditate, or simply unwind. You can build one in under an hour using basic materials like wooden poles, fabric, and rope.
Start with four to six wooden poles arranged in a cone shape. Secure them at the top with strong rope or twine. Drape fabric or tapestries around the frame, leaving an opening for the entrance.
Choose fabrics with natural textures and earthy colors to match the bohemian style. You can add lace trim or macramé details for extra visual interest. Layer vintage-style rugs and floor cushions inside to create comfortable seating.
Place your teepee in a quiet corner of your garden. Position it under a tree for natural shade or near your flower beds for a scenic view.
You can personalize the space with string lights, hanging plants, or dreamcatchers. Keep the interior simple with just a few cushions and a blanket. This creates a private retreat where you can enjoy your garden in comfort.
11. Use repurposed glass bottles as garden edging
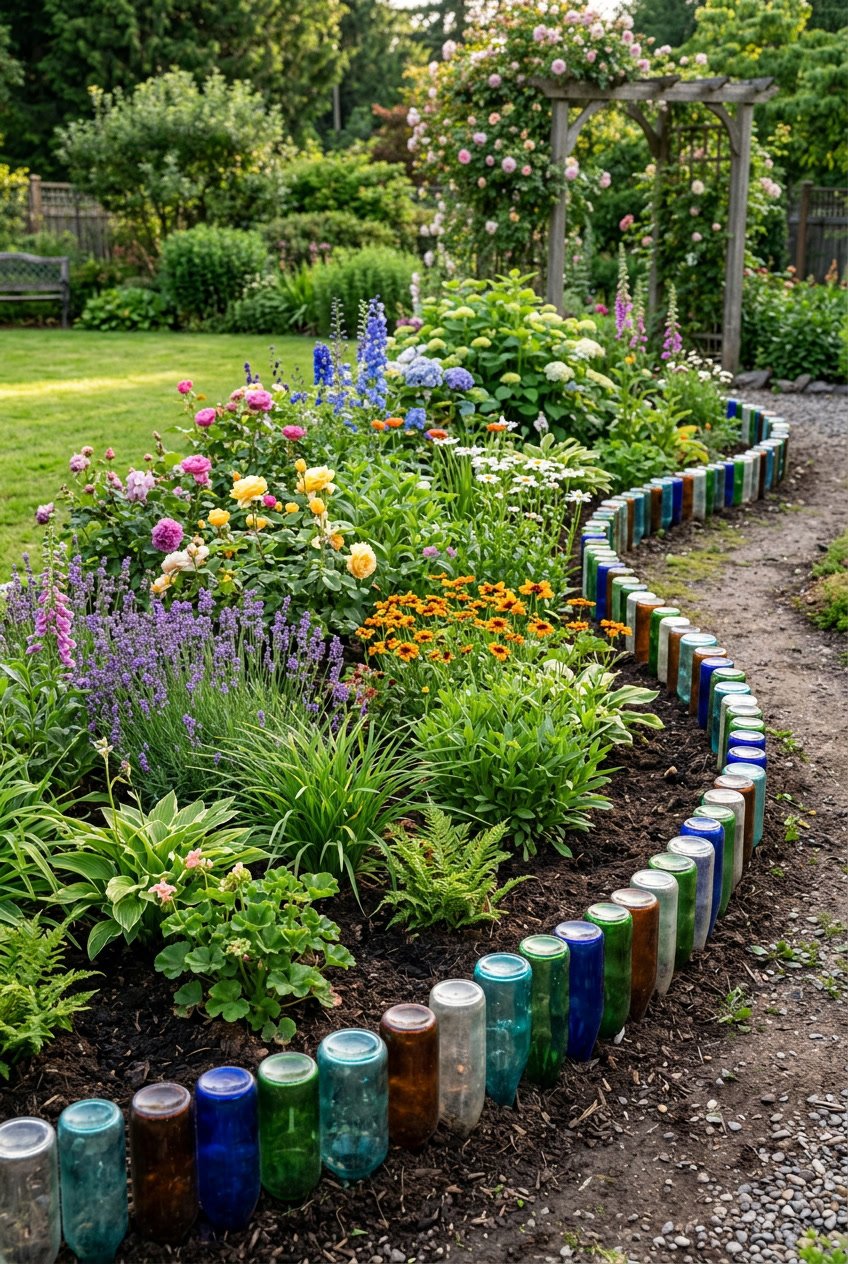
Glass bottles make excellent garden edging that adds color and character to your flower beds. You can use wine bottles, beer bottles, or any glass containers you have around your home.
To create this edging, dig a trench along your garden border about 4-6 inches deep. Place the bottles upside down in the trench, burying them about halfway into the soil. Press them firmly into place so they stay stable.
You can arrange bottles in a single row or cluster them together for a thicker border. Mix different colored glass to create patterns, or stick with one color for a uniform look. Green and brown bottles are easiest to find, but clear or blue glass adds variety.
This approach works well for defining vegetable gardens, flower beds, or pathway edges. The bottles create a solid barrier that keeps mulch in place and grass from spreading into your garden beds.
Clean your bottles before installing them and remove any labels. The glass catches sunlight throughout the day, creating visual interest in your garden space.
12. Grow climbing vines on a handcrafted trellis
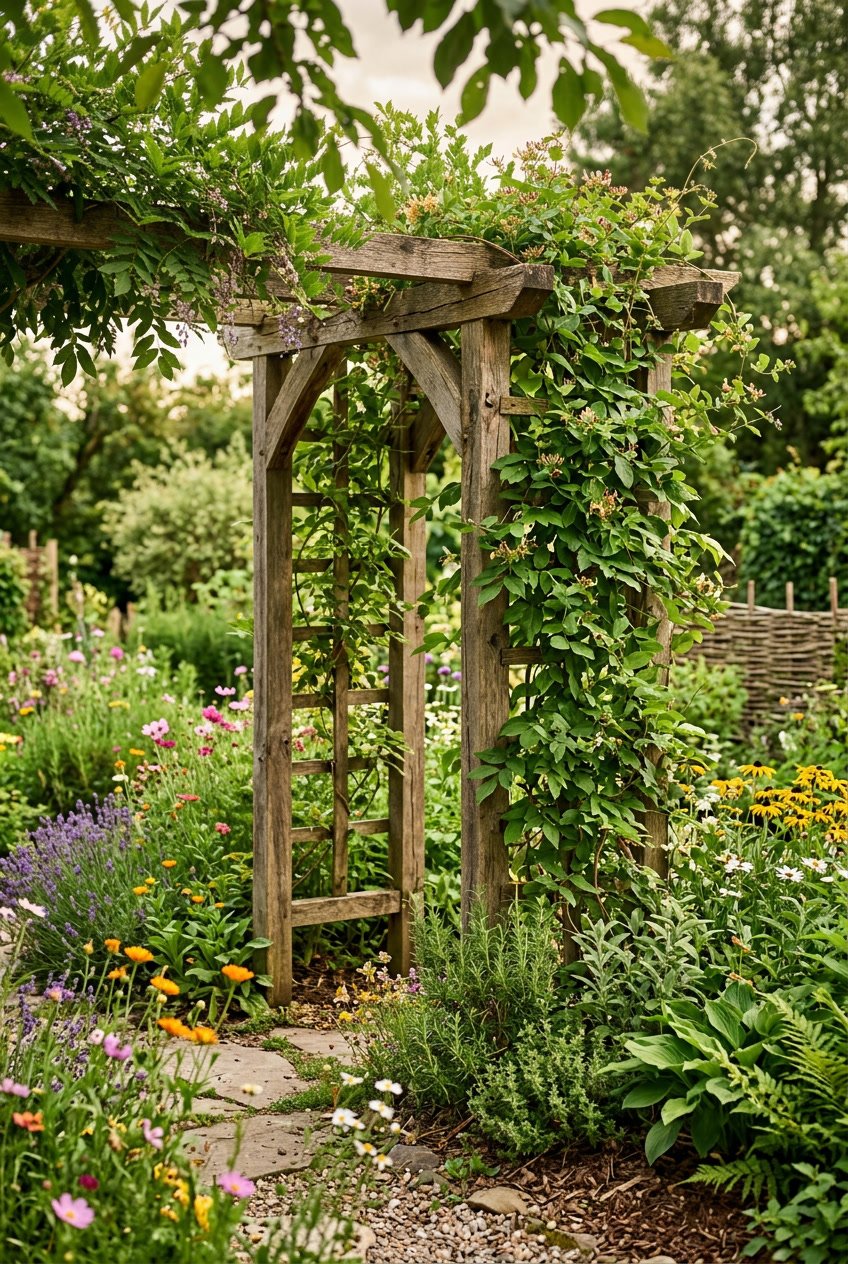
A handmade trellis adds structure and visual interest to your hippie garden while supporting climbing plants. You can build one using natural materials like bamboo poles, fallen branches, or reclaimed wood.
Climbing vines grow upward instead of spreading across the ground. This saves space and creates a living wall effect. Popular choices include morning glories, sweet peas, clematis, and passionflower.
You don’t need advanced skills or expensive supplies to make a trellis. Simple designs work just as well as complex ones. Tie bamboo poles together in a teepee shape, or lean branches against a wall to form a ladder pattern.
For edible plants, try growing pole beans, peas, or climbing cucumbers. These vegetables produce more food in less space when they grow vertically.
Place your trellis where it gets adequate sunlight for your chosen plants. Most flowering vines need at least six hours of sun daily. Secure the base firmly in the ground so it can handle the weight of mature plants.
Your handcrafted trellis becomes both functional garden art and a support system for thriving plants.
13. Scatter vintage rugs and cushions for a laid-back seating area
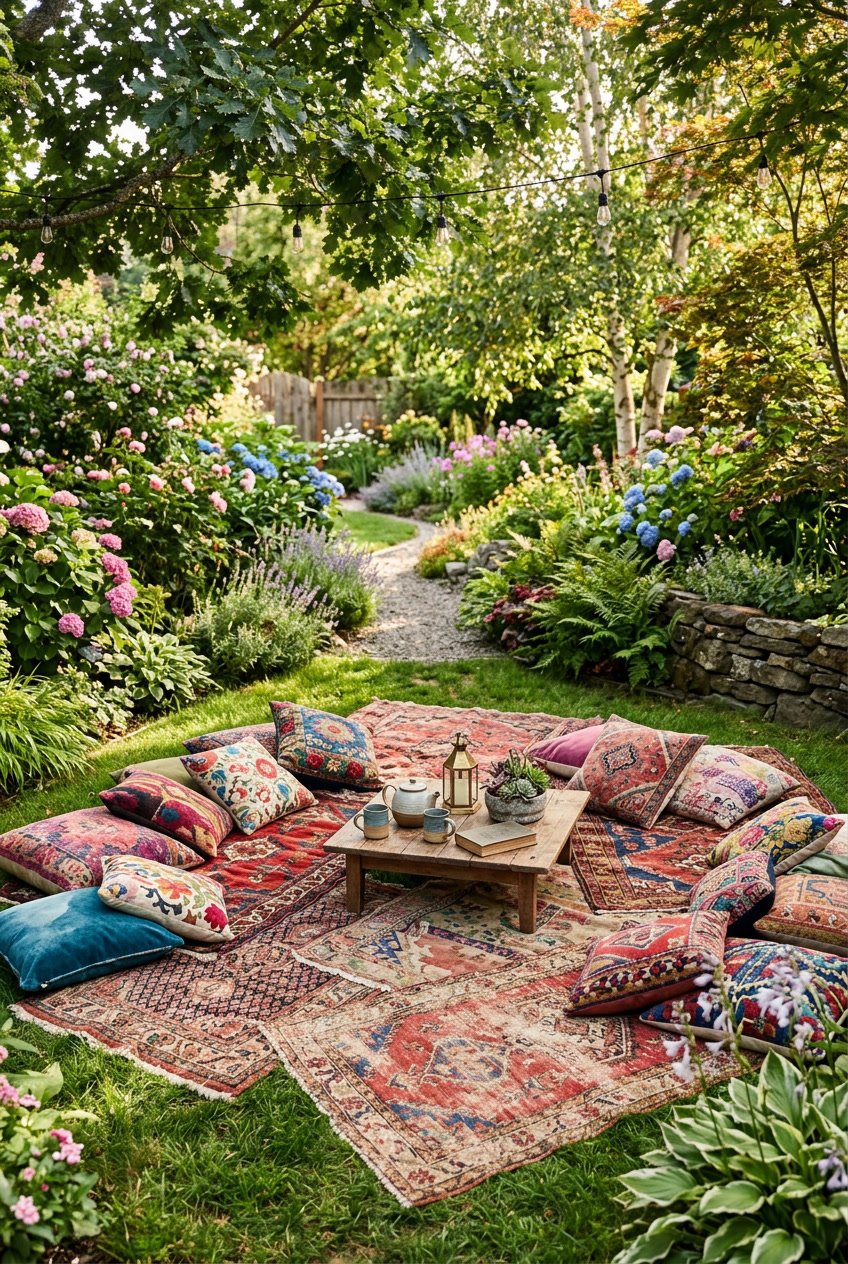
Create a relaxed gathering spot in your garden by layering vintage rugs and cushions on the ground. This setup works well under trees, on patios, or in any flat outdoor area where you want people to sit and relax.
Start with a large vintage rug as your base. Look for rugs with faded colors and worn patterns that give off a casual, lived-in feel. You can layer smaller scatter rugs on top to add more texture and visual interest.
Pile cushions in different sizes around your rug setup. Mix solid colors with simple patterns to keep things interesting without looking too busy. Place some cushions directly on the rugs for floor seating, which encourages a more casual and social atmosphere.
Use weather-resistant fabrics for outdoor cushions to protect them from moisture and sun damage. You can also bring regular cushions outside when you’re using the space and store them inside when you’re done.
Add poufs or floor ottomans around the edges to give people more seating options. This flexible arrangement lets guests choose where they want to sit while maintaining that easygoing hippie garden vibe.
14. Incorporate peace symbol sculptures or décor
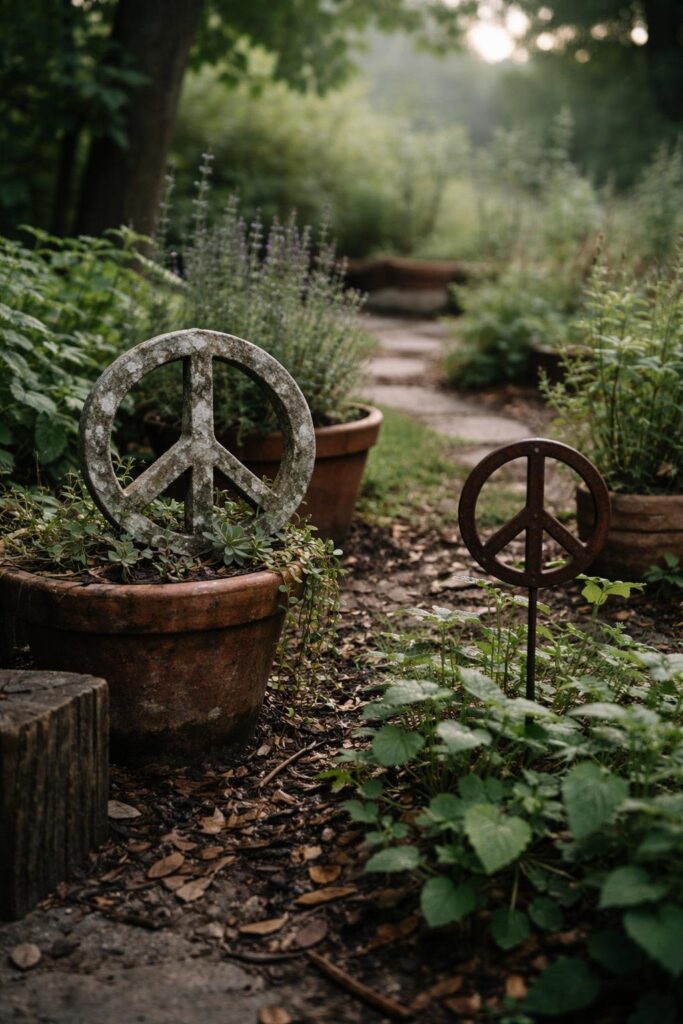
Peace symbols are one of the most recognizable parts of hippie culture. Adding them to your garden creates an authentic bohemian vibe that ties your whole space together.
You can place metal peace sign sculptures among your flower beds or hang them on your garden fence. These come in various sizes and finishes like rusty metal, painted bright colors, or natural wood. Pick ones that match your garden’s style.
Wooden peace signs work well when hung on trees or fence posts. You can buy ready-made versions or create your own by painting the symbol on reclaimed wood panels.
For a creative touch, consider making a peace sign flower bed. Use stones or edging to outline the iconic symbol, then fill each section with different colored flowers. This turns the peace sign into a living piece of garden art.
Smaller peace symbol decorations also add charm. Look for garden stakes, stepping stones, or wind chimes featuring the design. You can scatter these throughout your space to reinforce the peaceful, free-spirited atmosphere without overwhelming your garden.
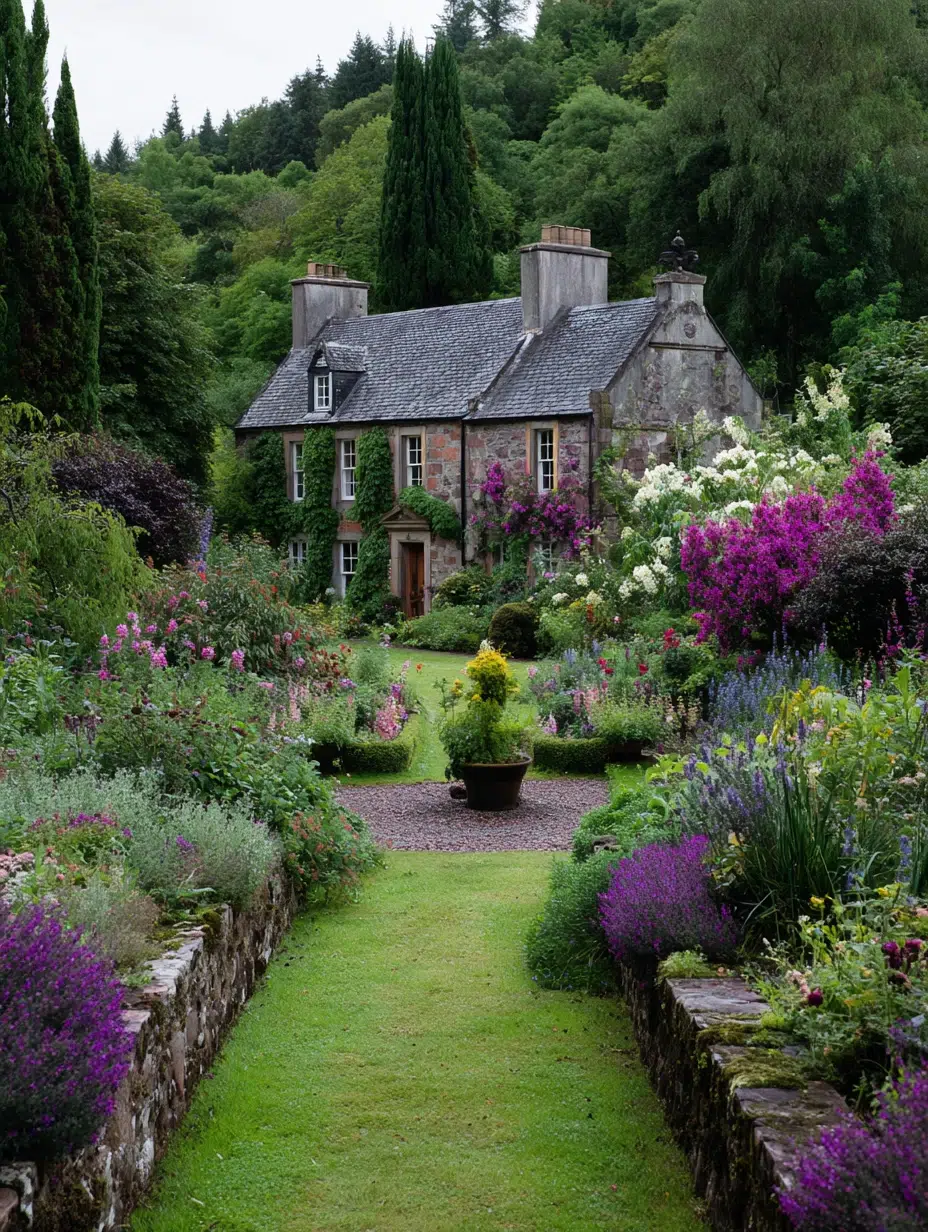
15. Plant fragrant herbs like lavender and sage for scent
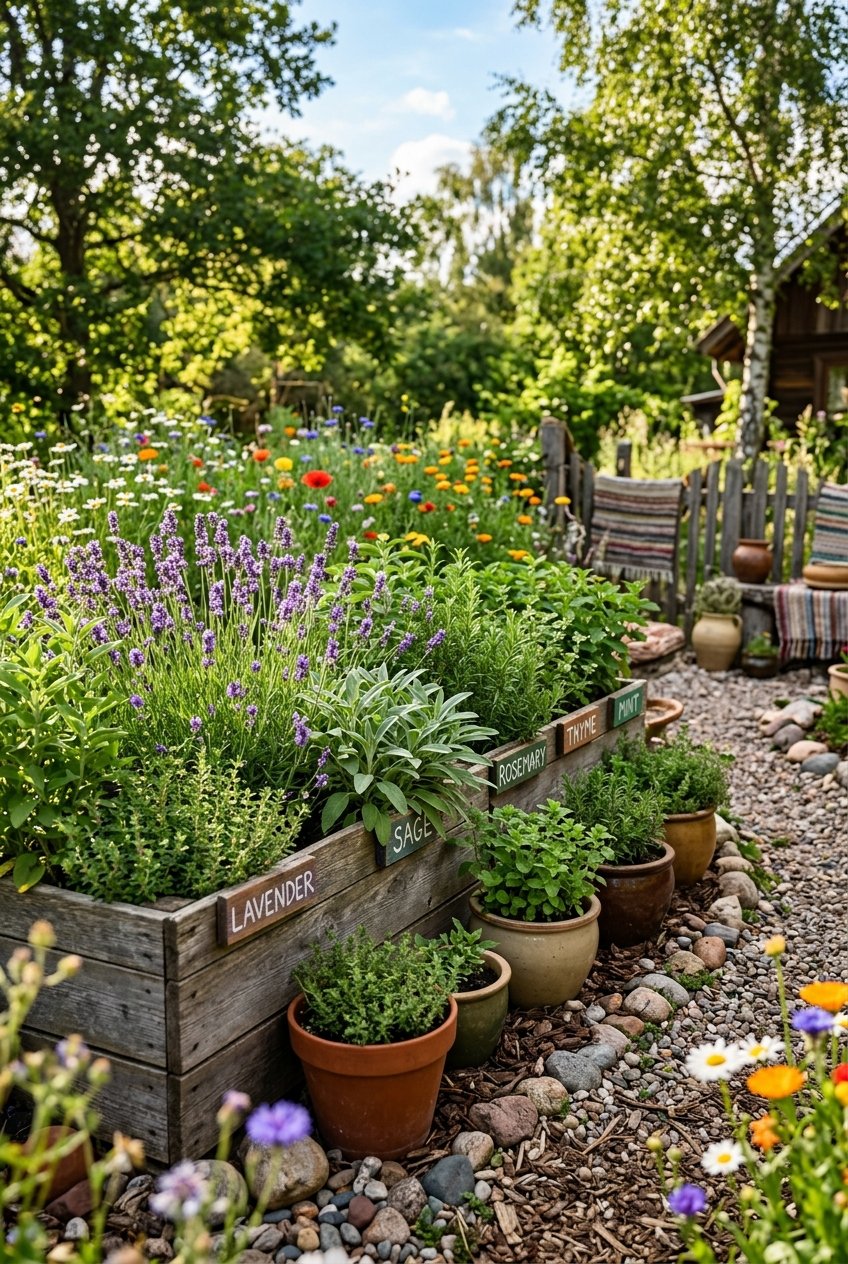
Fragrant herbs bring natural scent to your garden without chemicals or artificial perfumes. Lavender and sage are two of the best choices for creating a relaxing outdoor space.
Lavender releases a sweet, floral aroma that fills the air on warm days. You can plant it along pathways or near seating areas where you’ll brush against it. The purple blooms add color from late spring through summer.
Sage offers an earthy, herbal scent that pairs well with lavender’s sweetness. Both herbs are easy to grow and need little water once established. They thrive in sunny spots with good drainage.
Other fragrant herbs to consider include rosemary, mint, and lemon balm. Plant them in clusters so their scents blend together. When you touch the leaves or when the sun warms them, they release their oils into the air.
These herbs serve multiple purposes in your garden. You can use them for cooking, making tea, or simply enjoying their natural perfume. They also attract bees and butterflies, adding life to your space.
16. Use colorful mosaic stepping stones
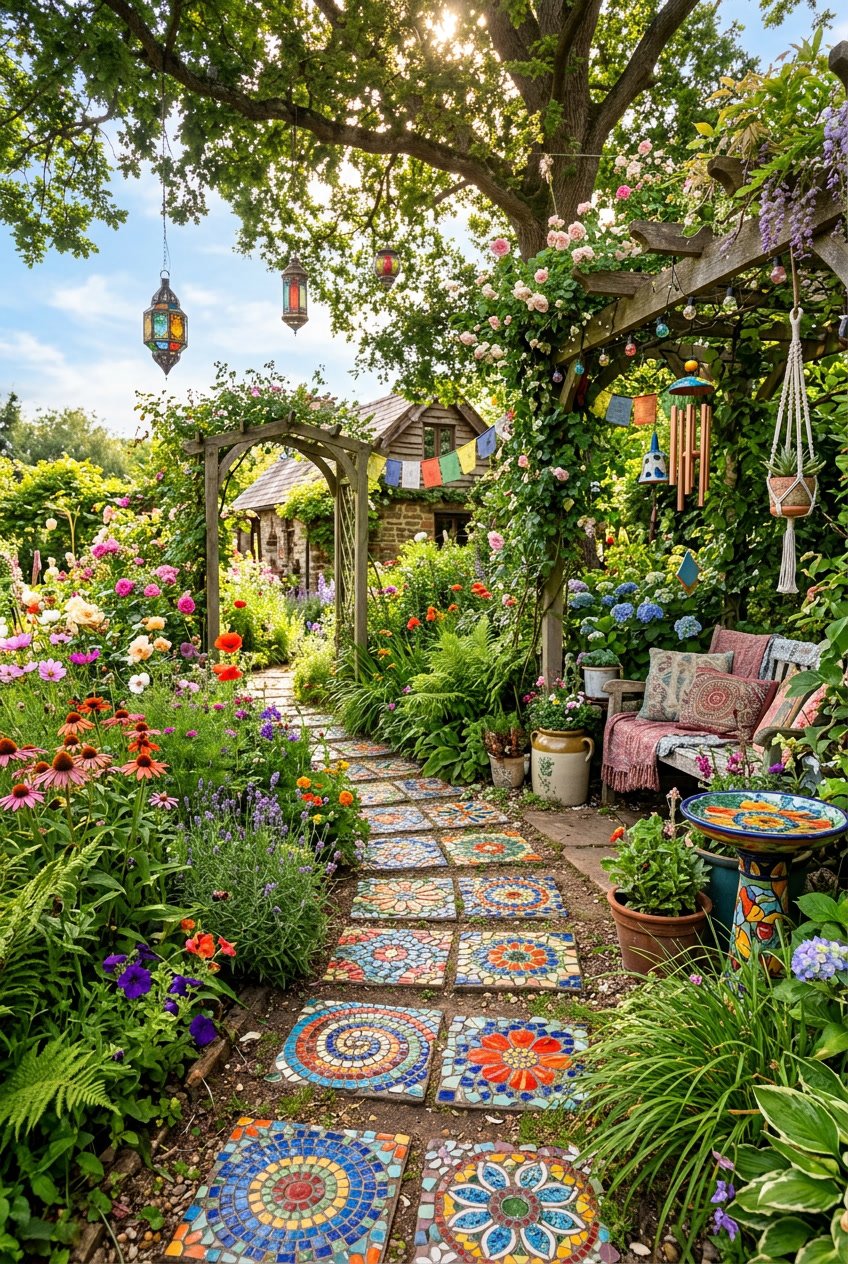
Mosaic stepping stones add bright colors and unique patterns to your hippie garden. These handmade path markers turn an ordinary walkway into a creative expression of your personal style.
You can make these stones yourself using broken tiles, glass beads, or seashells. Press the pieces into wet cement molds to create your design. Try floral patterns, mandalas, or geometric shapes to make each stone different.
The materials you need are easy to find and often inexpensive. You can use recycled tiles or broken pottery to keep costs down. This makes mosaic stepping stones a budget-friendly way to add color to your outdoor space.
Arrange your stones to create a winding path through your garden. You can use them to guide visitors to special areas like a meditation spot or seating area. The colorful patterns catch the eye and add texture to your landscape.
Making mosaic stepping stones is a simple DIY project that doesn’t require special skills. You just need some creativity and patience while the cement dries.
17. Set up a small pond or water feature with natural stones
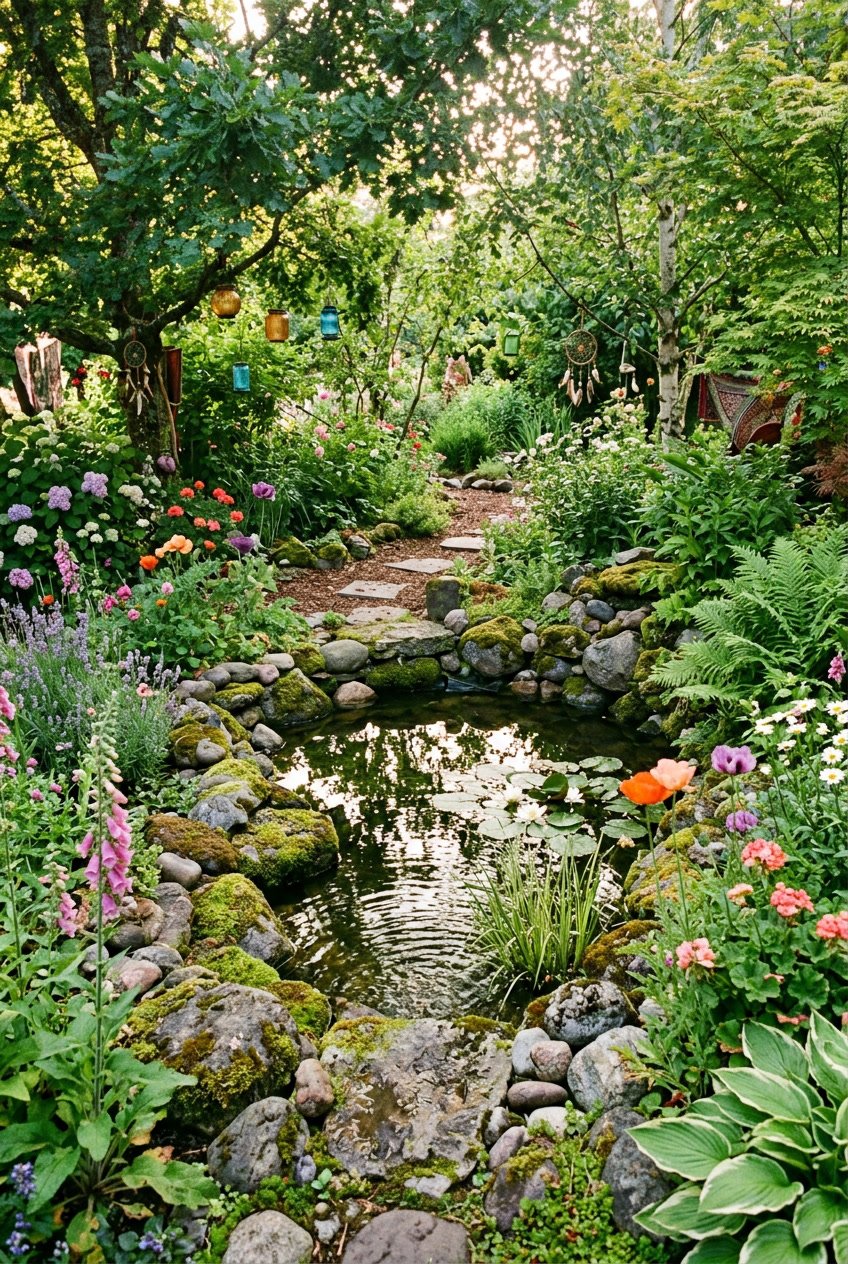
A small pond adds a peaceful element to your hippie garden. You can start by digging a shallow hole and adding a preformed liner. This makes installation simple and quick.
Natural stones work perfectly for edging your pond. Place larger rocks around the perimeter first, then fill gaps with smaller stones. This creates an organic look that fits the free-spirited garden style.
Add a small pump to keep the water moving. Moving water prevents mosquitoes and creates a calming sound. You can find affordable pump kits at most garden stores.
Surround your pond with a mix of plants. Herbs and flowering plants soften the edges and blend the water feature into your garden. Natural stone pathways leading to the pond enhance the overall design.
Keep your pond small if you want less maintenance. Even a simple setup with a few stones and water plants brings life to your space. You can also add floating plants or small fish once your pond is established.
18. Integrate bird feeders made from recycled materials
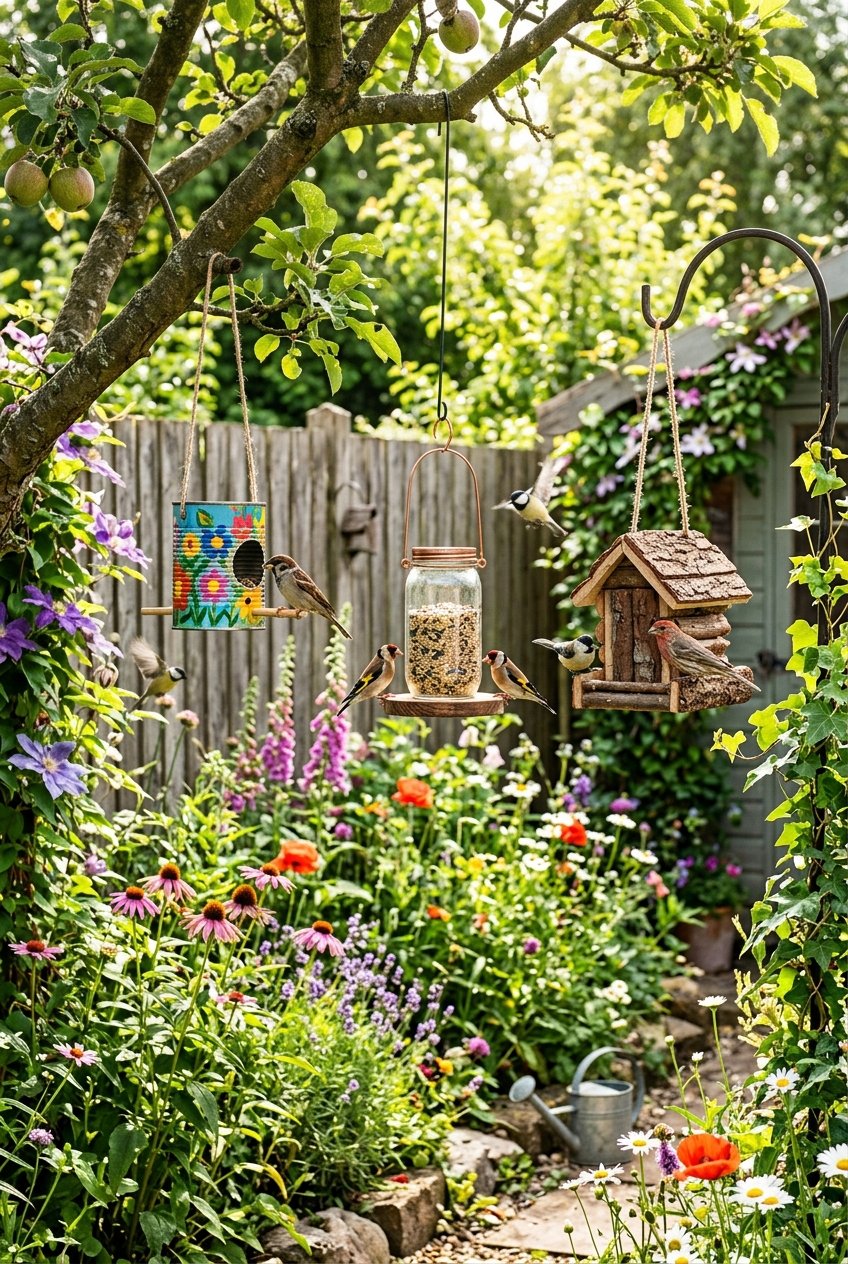
Bird feeders made from recycled materials add a sustainable touch to your hippie garden while attracting feathered visitors. You can transform old plastic bottles into functional feeders by cutting openings for birds and adding wooden perches. These upcycled pieces give waste a second life while providing birds with a place to eat.
Old teacups, mason jars, and tin cans work well as unique feeder designs. You probably have these items sitting unused in your home already. Simply clean them thoroughly and attach them to tree branches or garden posts with wire or rope.
Milk cartons and juice containers make excellent starter projects if you’re new to DIY crafts. Cut access holes on the sides and decorate them with non-toxic paints in bright, cheerful colors that match your garden’s vibe.
Using recycled materials for bird feeders supports environmental values central to hippie garden philosophy. These projects cost little to nothing and reduce waste heading to landfills. You’ll create a welcoming space for local birds while expressing your commitment to reusing and repurposing everyday items.
19. Create a sun dial or natural art installation

A sun dial adds both function and artistic interest to your hippie garden. You can make one using simple materials like stones, driftwood, or a flat piece of slate with a stick as the gnomon. Position it in a sunny spot where you can watch the shadow move throughout the day.
Natural art installations bring a personal touch to your outdoor space. Gather materials from nature like fallen branches, river rocks, or colorful leaves to create sculptures or patterns. You can arrange stones in spiral designs or hang driftwood pieces to catch the light.
These installations change with the seasons and weather. Your sun dial becomes covered with morning dew, while your natural art pieces weather and shift over time. This constant change fits perfectly with the free-spirited nature of a hippie garden.
You can also combine both ideas by creating a sun dial that doubles as art. Paint rocks in bright colors or tie-dye fabric strips around branches. The key is to use what you find in nature and let your creativity guide you.
20. Add solar lanterns hanging from tree branches
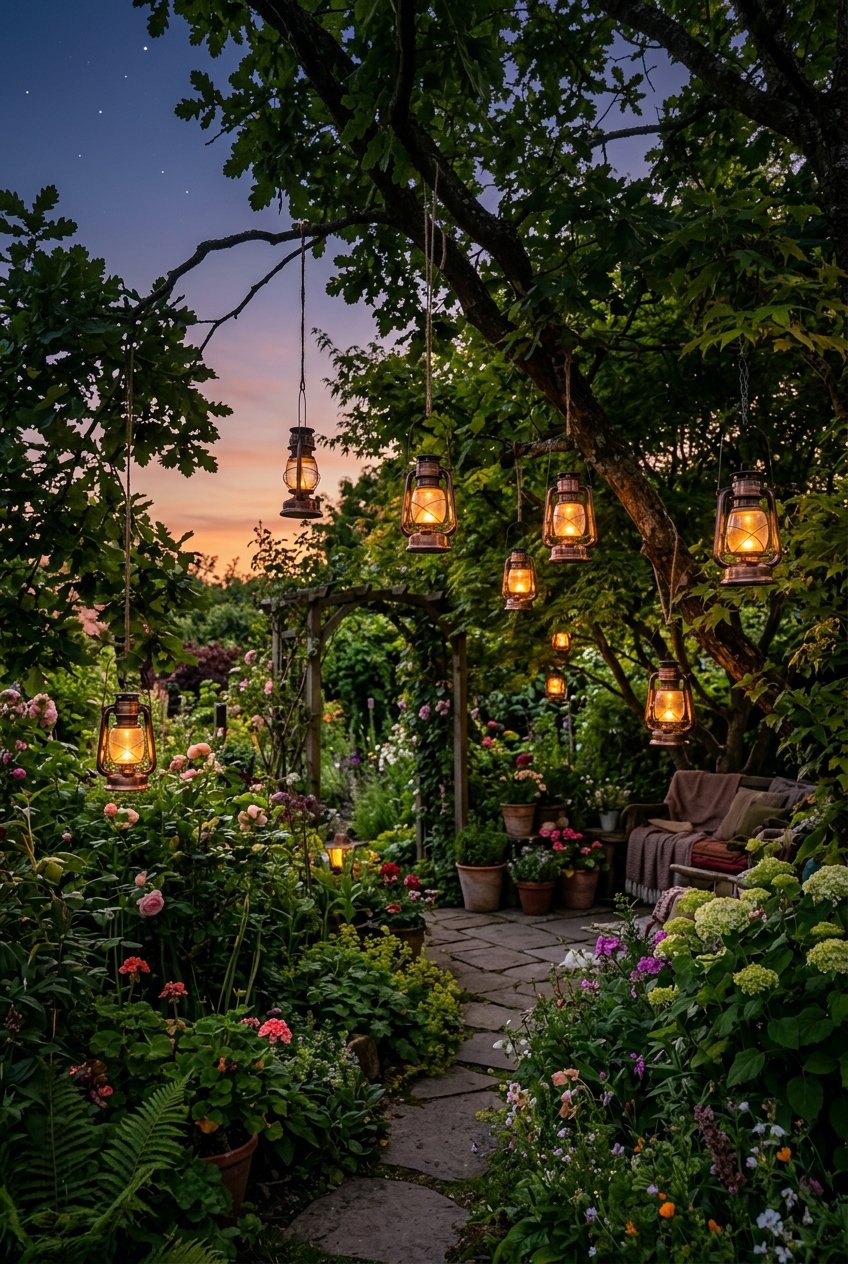
Hanging solar lanterns from tree branches creates a warm, inviting glow in your garden after sunset. This lighting method works well because it uses natural structures already in your space while providing eco-friendly illumination.
You can hang lanterns at different heights throughout your trees to add visual interest. The varied placement creates depth and draws the eye upward through your garden. Solar lanterns charge during the day and turn on automatically at dusk, requiring no electrical wiring or ongoing energy costs.
Choose lanterns that match your garden’s style. Mason jar solar lights offer a rustic look, while metal or paper lanterns can create different moods. You can also mix different sizes and styles for a more eclectic feel.
String the lanterns from sturdy branches using hooks or weather-resistant cord. Make sure they get enough sunlight during the day to charge properly. Place them along pathways, over seating areas, or throughout your trees to create a magical atmosphere that’s both practical and beautiful.
21. Make a fairy garden using miniature accessories
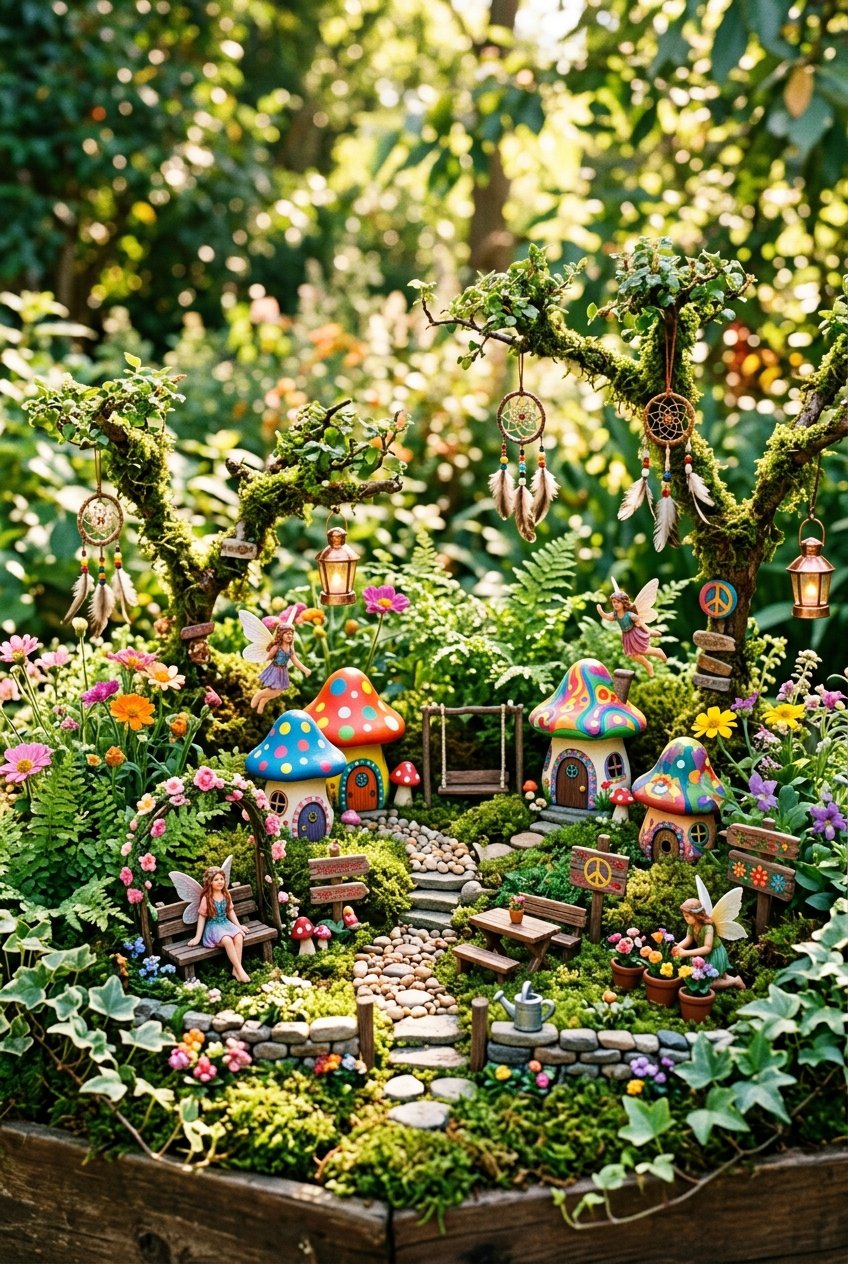
Fairy gardens bring a touch of magic to your hippie garden space. You can create a small world filled with tiny houses, plants, and decorative pieces that reflect your free-spirited style.
Start by choosing a container or small outdoor area for your fairy garden. Terracotta pots, wooden boxes, or a corner of your garden bed work well. Add small-scale plants like succulents, moss, or miniature flowers as your base.
Select accessories that match your bohemian vision. Look for tiny peace signs, miniature wind chimes, or small figurines that represent nature and harmony. You can make your own accessories using natural materials like twigs, stones, and shells.
Create pathways with small pebbles or sand. Add miniature furniture made from driftwood or craft sticks. Place tiny planters or create a small meditation area within your fairy garden.
Your fairy garden grows and changes with the seasons. You can rearrange accessories or add new elements whenever inspiration strikes. This flexible approach fits perfectly with hippie garden values of creativity and connection to nature.